Table of Contents: Claris Connect Series
- Claris Connect and Amazon Web Services (AWS) – Getting Started
- Using Claris Connect with AWS Simple Notification Service (SNS)
- How to Implement Custom Responses in a Claris Connect Flow
- Claris Connect and AWS S3
- Trapping and Handling Errors in Claris Connect Flows
- How to Integrate Claris Connect with Amazon SES
- How to Create Custom Connectors in Claris Connect
In this ongoing series of posts about Claris Connect and Amazon Web Services (AWS), we’ve looked at how to set up your AWS account and how to get started with a Claris Connect Flow using Amazon Simple Notification Service (SNS). We’ve also looked at different Flow triggers, namely Trigger by Script and Incoming HTTP Request, and shared how to implement custom JSON responses in a Flow.
Another interesting Amazon service that can be integrated into FileMaker apps (and non-FileMaker apps) using Claris Connect is Amazon Simple Storage Service, more commonly known as S3. When integrating FileMaker Pro with Amazon S3 via a platform such as Claris Connect, the steps won’t always be linear. This post will try to cover all aspects involved, but there will be a little back and forth while preparing and hooking up connections. We won’t cover all the features of S3 nor go into the pros and cons of storing container data from FileMaker in S3. Instead, we will focus solely on how to send container data from FileMaker to S3 using Claris Connect.
Storage and S3
Amazon S3 is an object storage service that currently stores data for millions of customers around the world. Data is stored within resources called “buckets.” With S3, you pay for what you use. Amazon charges for data stored in buckets, but the storage pricing is a few cents per GB/month. S3 provides a low-cost scalable data storage alternative to traditional FileMaker container storage. For more information, see the Amazon S3 Features page. You can review how to set up an AWS account here, too.
For S3, much of the same principles apply — you configure the service, create IAM user accounts, and assign these accounts permissions. Permissions are assigned through what AWS calls “Policies” so that users have access to the S3 bucket(s) that you created. Policies are JSON documents that define permissions for Users, Groups, or Roles.
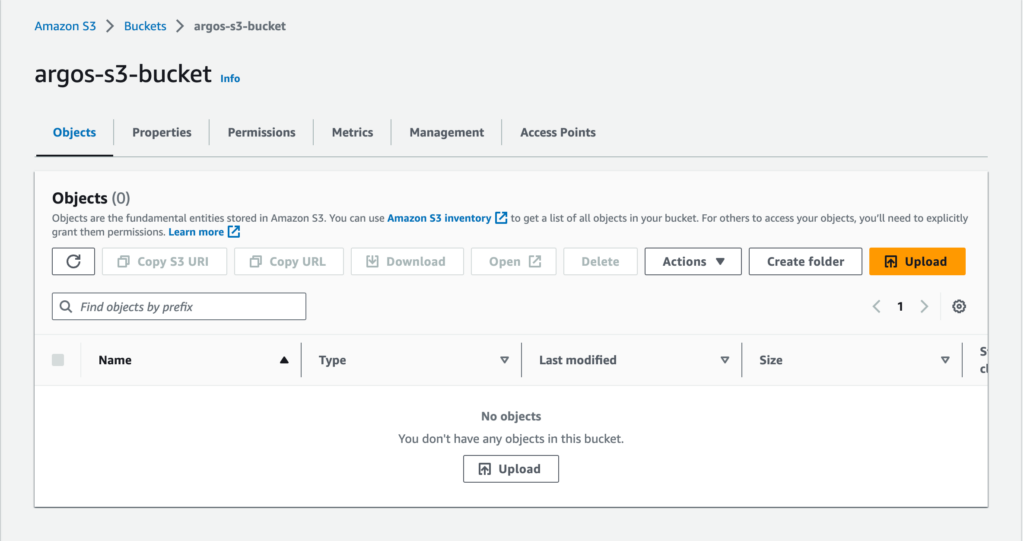
Here, we’ll walk through specific steps for a basic configuration of S3 and a user (account) configured to access S3. Within your AWS Console, locate the S3 service and create a bucket. The initial bucket won’t have any objects, but if all goes well when you run the Claris Connect Flow, this will upload a file to your bucket. For the purposes of this integration, we have left all default settings in place, enabling “AmazonS3FullAccess” as the permissions policy.
IAM Accounts
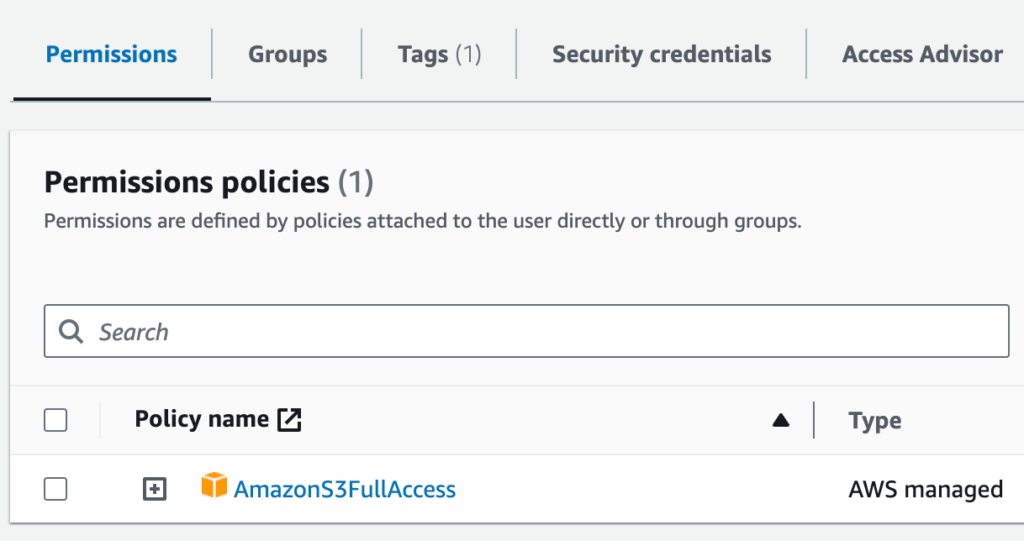
Our preference for these integrations is to create specific IAM accounts for each type of integration, so we created an IAM account just for S3. (See our initial post in this series for more information on IAM). We then gave this account access to the newly created bucket. Contrary to our usual preference in terms of the principle of least privilege, Claris Connect states that the IAM permission required is “s3.*” rather than just “s3.PutObject”. As with SNS and SES, it appears we are required — when using ClarisConnect — to give admin access, even when we use a fraction of the actions that the Admin policy grants. Hence, we applied the “AmazonS3FullAccess” policy to our dedicated IAM account for the S3 Flow.
Setting Up the Flow in Claris Connect
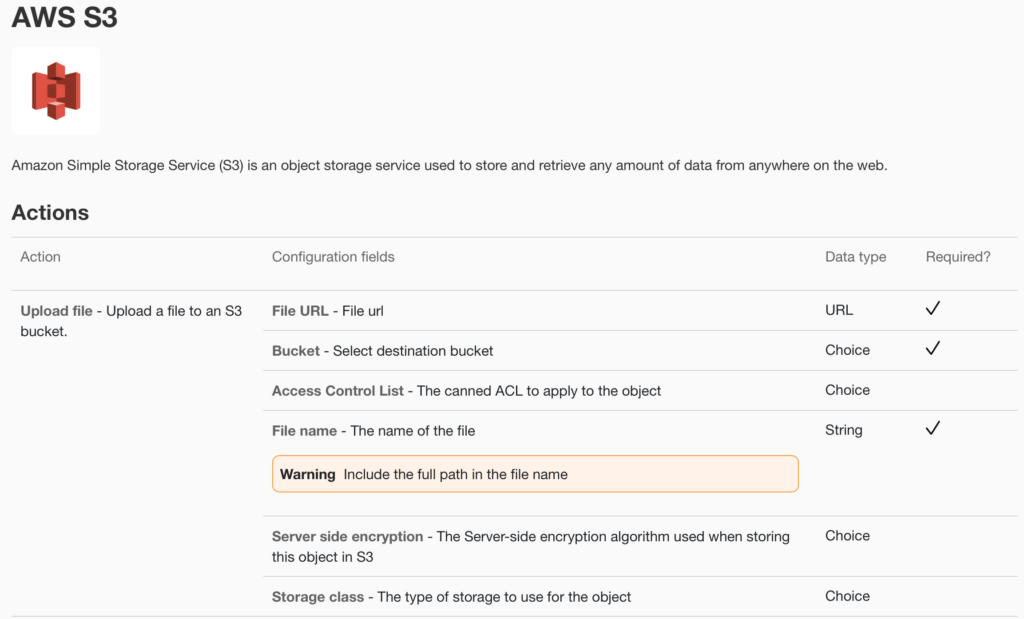
Documentation and connectors for S3 in Connect are somewhat limited. The sole action available is “Upload file – Upload a file to an S3 bucket.” There are six configuration fields, and three of these are required: the file URL, the S3 bucket, and the file name.
If you’re working with files on a web server, you could point directly to the file URL. You can test this in your Flow by pushing a file to S3 via the file’s public URL. For example, find an image on the web, then click on that image to get its URL. Enter this URL in your Claris Connect Flow. Then, using the Review and Test option at the top right, test this specific action in the Flow. Although our end goal is to push container data from FileMaker to S3, using a public URL to push files to S3 is a quick way to test part of your Connect Flow.
Getting Your File URL
Getting data out of FileMaker containers requires a more roundabout way to get the file URL. This URL is not the same as the location on the hosted server. The steps to get the URL are covered in more detail below. The key involves step data and the action, Get Record by Id. Note also that you must include the full path in the file name. The file name becomes the Object Id in S3. In our example, we simply used the file name. A best practice might involve a combination of customer name or record UUID so that the name is unique.
Before we get to the file URL and how we’d extract this from FileMaker Pro, let’s take a look at the Claris Connect Flow. In this example, we use one trigger and three actions.
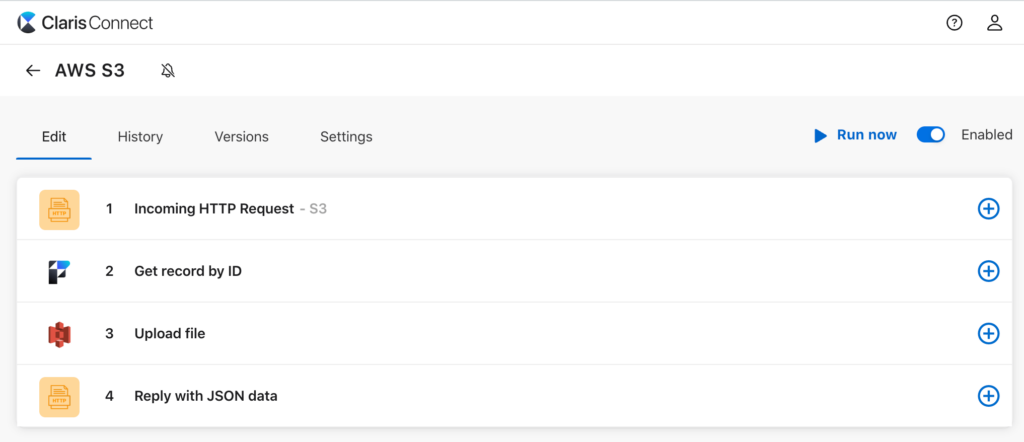
A previous post in this series compared the triggers Trigger by Script and Incoming HTTP Request. We won’t rehash the differences here, but we’re using the Incoming HTTP Request, which is the only trigger option under the HTTP Utility. This trigger uses a webhook, so make sure to create this first. Select your Project in the Claris Connect dashboard. In the left sidebar, click on Webhooks. Type a unique webhook name and click “Create.” This will create a webhook URL. Our script in FileMaker, which we’ll cover in more detail below, sends the record ID to Claris Connect as part of the cURL options. The record ID is then available as part of the chain of actions in this Connect Flow.
Expanding the Webhook
We’ve set up a webhook in our Claris Connect project. There are two available options when you expand the webhook.
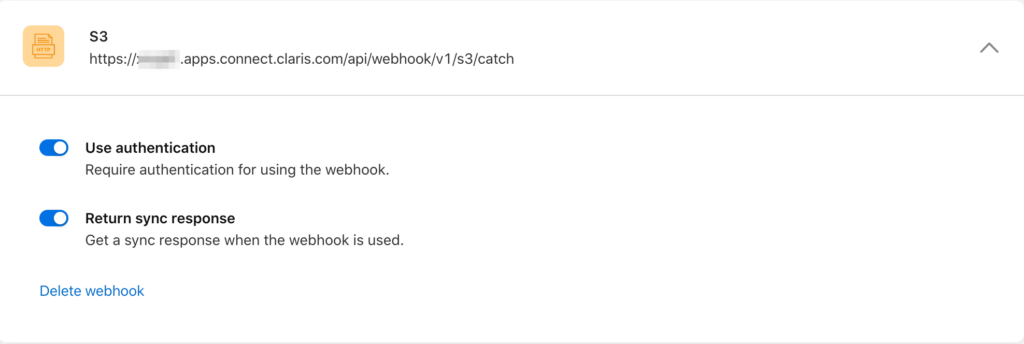
For our S3 connection, we chose to enable both the “Use authentication” and “Return sync response” settings. Using authentication generates a Project API Key and AppID, which we’ll use in the FileMaker Pro Script that triggers the Claris Connect flow.

We then select the appropriate webhook in the Incoming HTTP Request trigger. Note that the AppID appears in your url when sending the HTTP request.
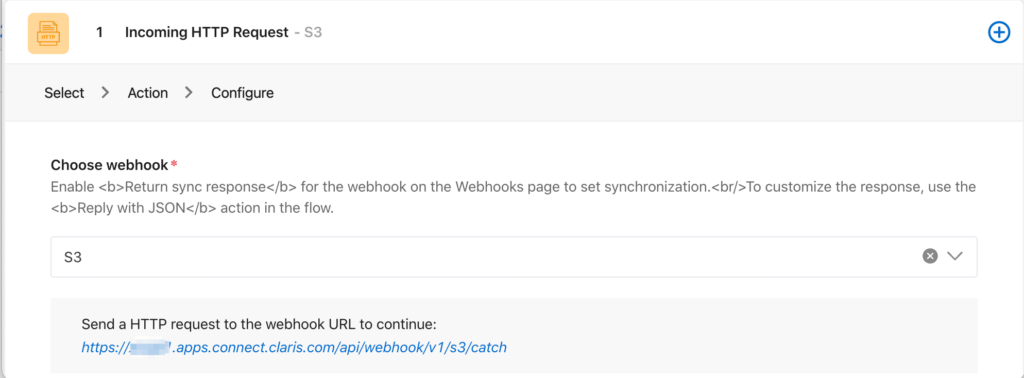
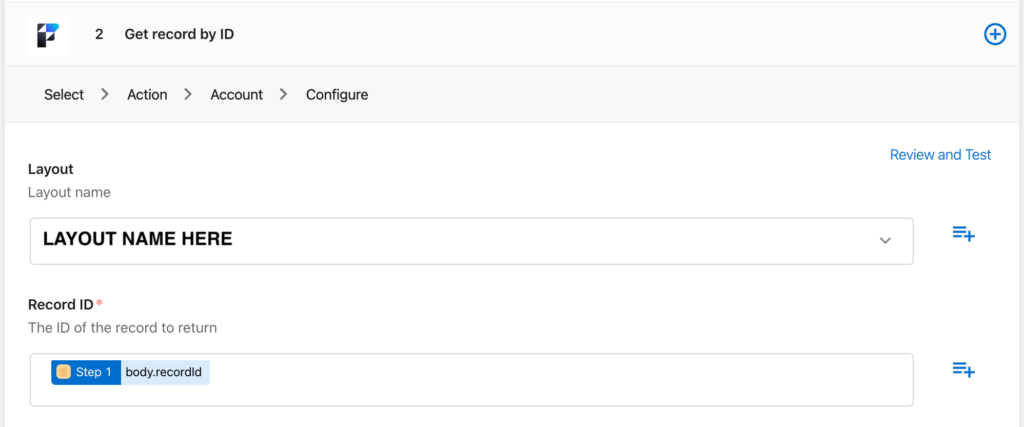
In order to get the URL of a file from a container field, since we’re connecting to our own cloud-hosted server, we used the action under Claris FileMaker Server called “Get Record by ID.” This action returns JSON formatted data about the record, including the URL and more. The URL looks something like this:
https://HOSTING_SERVER.domain/Streaming_SSL/MainDB/FILE_UUID.jpg?RCType=RCFileProcessor
Note that the actual server domain and file UUID will be different for each server/file.
When configuring this trigger, you’ll connect to your hosted FileMaker database by creating an “app connection” (covered in previous posts in this series). Then, specify a layout by clicking on the + icon to the right. The Record ID is pulled in using step data, which is a means to get data from previous actions. In this case, we’re getting the body.recordId from the JSON returned in the Incoming HTTP Request (we’ll see how to call that from FileMaker in a moment).
Uploading Your File
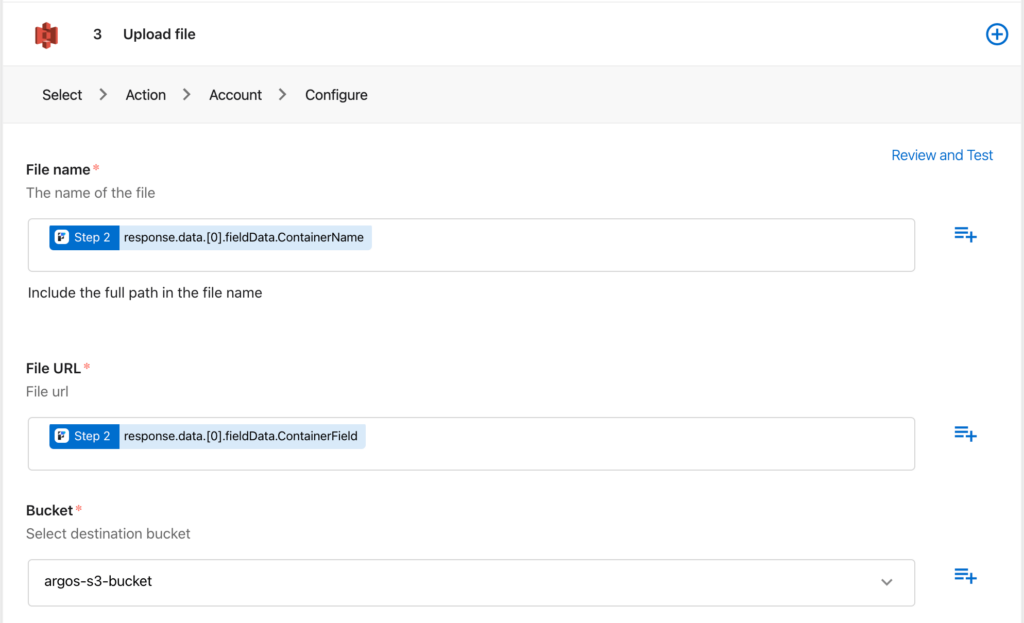
Once we have the record id, our next action is the S3 “Upload file.” Looking back at the documentation, there are three required values in the configuration fields — File URL, Bucket, and File name. The documentation warns about including the full path in the filename, which we believe to be the path used in S3. In that sense, you could add a folder name to the path. This would let you organize the files in your S3 bucket in folders.
In the step data from the “Get Record by Id” action, we point to the container field’s name field that we set up in our FileMaker database: response.data.[0].fieldData.ContainerName. The same step data method applies to the File URL and the container field itself—2 response data. [01 fieldData.ContainerField.
The last required configuration field is the S3 bucket. If you’ve logged into your AWS account using the IAM account while setting up this flow, you should be able to select the bucket name from the drop-down.
Not Quite Done
Once you know the connection to S3 works, you could stop here with just the trigger and the two actions that upload the file. But we’re not done. Although an upload works from FileMaker (and we’ll see how to set up that piece next), we noticed that the file transfer dialog in FileMaker Pro remained open even after the file transferred.
No automatic response is sent from a Connect Flow step. As FileMaker is waiting for a response, we need to explicitly add this. By adding the third action — Reply with JSON— we can get confirmation that the file uploaded (or an error if that’s the case), and that file transfer dialog also closes. In our case, we simply added a return with the location in the JSON data, which we then can parse in the FileMaker Pro script. To extend this even further, you could add error trapping to your Flow, something that will be covered in a future post.
In addition, as stated in a Claris Support article:
“By default, Claris FileMaker Server and Claris FileMaker Cloud allow only explicitly authenticated and authorized clients to access container field data. To access container field data from Claris Connect without explicit authentication and authorization, you must change a security setting.”
Claris Engineering Blog
To enable this setting, you will need to run this command via the Command Line Interface (CLI):
fmsadmin set serverprefs AuthenticatedStream=2
Configuring the Script in FileMaker Pro
We start the process to “upload” the container file to S3 from within FileMaker Pro by configuring a script. Note that this script uses the Insert from URL step. In FileMaker Pro 20.x, there’s a specific Claris Connect script step that does pretty much the same thing.

In the FileMaker Pro script, we first declare some variables for the AppID and API Key. We then combine these into the authorization format. We include the record ID in a JSON object that we’ll send in the cURL options. The cURL options include POST as the method, the $auth variable for authentication, JSON as the Content-Type, and the $json_data in the body. Lastly, we dump the header into a variable to review in the data viewer.
Alternate Script Step
With FileMaker 20.2, an alternate script step called “Trigger Claris Connect Flow” can be used instead of the “Insert from URL” script step. You will need to sign into FileMaker Pro with your Claris ID in order to see your team and Flows. Before you sign in with your Claris ID, you’ll see this dialog when you select the Trigger Claris Connect Flow script step.
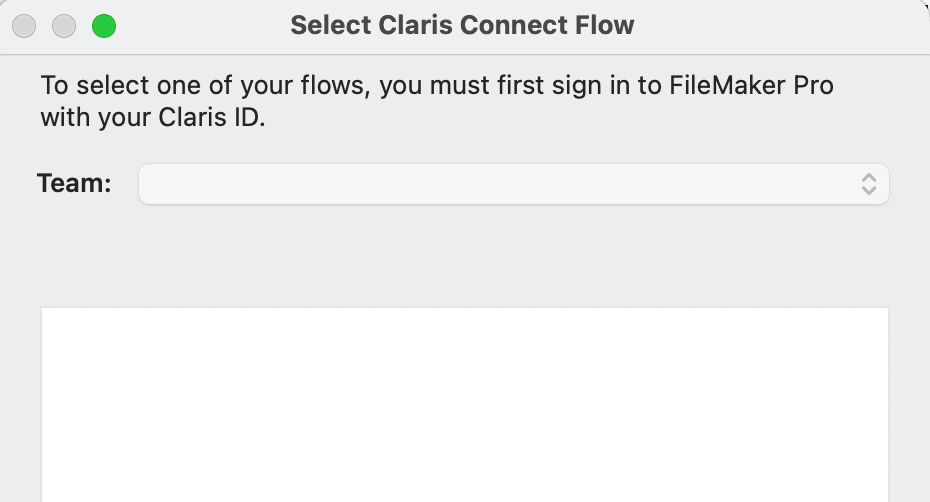
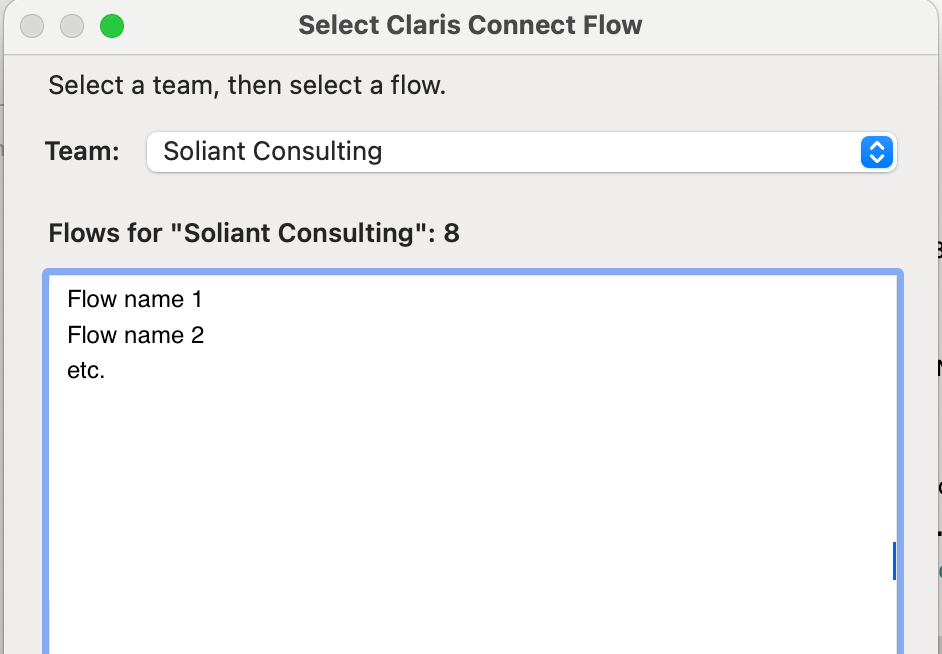
Once you’ve signed in with your Claris ID, you’ll see your Team, as well as a list of your Flows. Select your Flow and continue, then fill in the other options.
Those other options include the URL and AppID+APIKey combo, which FileMaker Pro automatically fills in for you from your Flow. Add the Target, such as a $response variable. The JSON Data is similar to the example with Insert from URL, except that you no longer need the {“action” : “script” } element.

If all goes well, when you run your script from the context of a record with a container, it will upload that container to your S3 bucket using the Claris Connect API calls and return a response into your $response variable. This variable contains the location element, with your bucket name in the path.
{"location":"https://BUCKET_NAME.s3.amazonaws.com/FILEPATH"}Moving Forward in Linking FileMaker and S3
Integrating Claris FileMaker – or another app – with AWS S3 is almost trivial with using Claris Connect. Direct or custom integrations usually require additional programming to account for authentication, but all this is managed within Claris Connect. Sometimes, the lack of examples within the documentation, or even some of the terminology choices, can be distracting at best. There’s far more to explore in terms of S3 (such as versioning, permissions, and sharing), and also how to access that data from FileMaker once it’s been pushed up to S3.
We’ll be exploring some of these opportunities in future posts. However, if you’d like to explore them for your FileMaker application now, our team can help. Contact us to talk to a consultant today.