FileMaker 2024 (i.e. FileMaker 21.0), was released on June 4, 2024. Learn more about FileMaker 2024 on the Claris website. If you’re exploring a new solution on the Claris platform, we encourage you to sign up for a free trial here.
Think of a swap file as an overflow area for your server’s memory. When the available RAM is under pressure, the operating system can use a swap file to offload what it has in memory to the hard disk, temporarily.
The short version, then, is a swap file makes your server more resilient, especially with memory-intensive tasks.
Many Ubuntu installations start life without a swap file. Fortunately, it is easy to add it. We very highly recommend that you always do.
FileMaker Server 2024 will now prompt you during installation if no swap file is detected. The installer takes care of adding one for you.
If you use the assisted installer, there are new options for this there as well. This blog post will walk you through the process of adding a swap file manually, in case you have an older version of FileMaker Server or opted out of letting the installer do this for you. Or, if you did an upgrade-in-place of your FileMaker Server to 2024, which then also does not add a swap file if one doesn’t exist yet.
Do I have a swap file?
First things first, here is how you can check if your Ubuntu server has a swap file or not. From the command line, type in:
swapon -s
Or:
free -m
htopAnd check the top left corner.
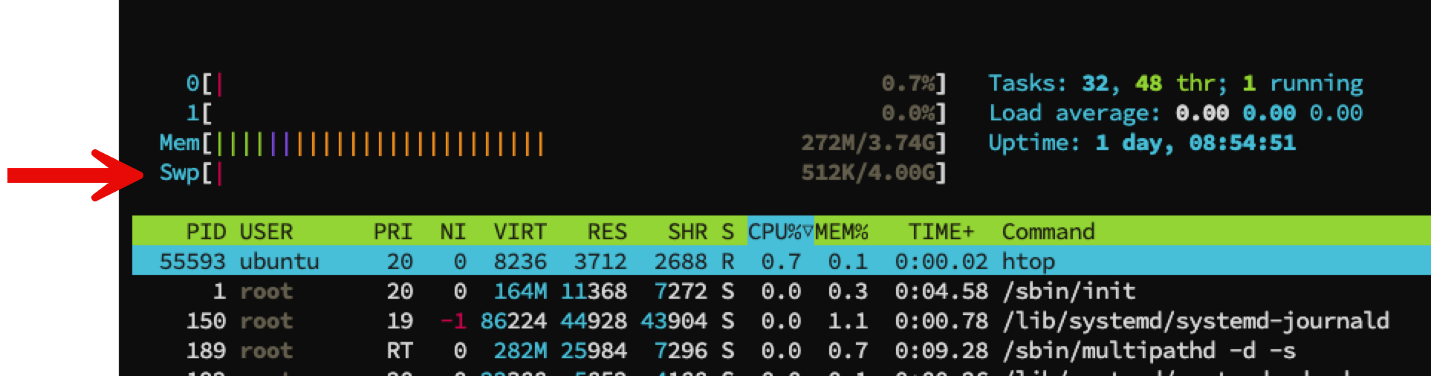
If you have a swap file, it will be listed and be non-zero. You do not need to do anything.
I need to add a Swap file.
First, you will need to decide two things:
- The size of your swap file
- The swappiness of your swap file. Yes, that’s an actual technical term.
How Big?
The size of the swap file depends on the amount of physical RAM. The Ubuntu helps explain the equation you can use to determine the swap size. When you read the documentation, follow the guidelines for the scenario without hibernation because a FileMaker Server machine should never hibernate.
The math then works out to this minimum-to-maximum range for your swap file size, where RAM is how much memory your server has:
round( sqrt( RAM )) 2 x RAMRealistically, given the minimum memory specs of a FileMaker Server, the minimum size should be 4GB for servers with up to 16GB of RAM. After that, there will be diminishing returns with a bigger swap file because the more memory a machine has, the less likely the memory will come under pressure. However, even if you have a lot of memory, you should still use a swap file. 32GB of RAM results in a 6GB swap file at its smallest.
4GB is a safe default for most situations. Most memory pressure on a FileMaker Server machine will come from server-side activity such as web publishing and WebDirect. If you have more than a couple of WebDirect users, we strongly suggest that you start working with WebDirect worker machines. If your FileMaker Server is hosted on Soliant.cloud, then you can make use of our dynamic WebDirect auto-scaling feature to take the pain out of deciding how many workers’ servers to build.
Another feature to use is the Java Garbage Collection feature that Claris introduced a few versions ago.
How swappy?
The second decision is about how aggressive you want Ubuntu to be about offloading processes when the memory is under pressure. It’s a scale between 0 and 100, with 100 being very aggressive. A high setting can lead to slower response times for systems and applications if processes are too aggressively moved out of memory (because disks are slower than RAM). Using 0 tells the kernel to avoid swapping processes out of physical memory for as long as possible. We typically use a setting of 5, definitely on the conservative side of the scale, telling Ubuntu to only swap to the disk when it is strictly necessary.
Add the Swap file.
When you install Claris FileMaker Server and are prompted to add a swap file, you do not get a choice of size or swappiness. The installer will default to a swap file of 4GB and a swappiness setting of 10.
With the assisted install file, you can control both settings yourself.
To manually add the swap file, first allocate some disk space to it and set the access permissions correctly.
sudo fallocate -l 4G /swapfile
sudo chmod 600 /swapfile
Then tell Ubuntu to use this allocated disk space as a swap location and to start using it as such:
sudo mkswap /swapfile
sudo swapon /swapfile
At this point, you have a working swap file, but it will not persist when you reboot the server. To do that, you must permanently add the disk allocation to the standard config file for disks (after making a backup copy of that file):
sudo cp /etc/fstab /etc/fstab.bak
echo '/swapfile none swap sw 0 0' | sudo tee -a /etc/fstab
And because Ubuntu by default uses a fairly high setting for swappiness, you must adjust it to your liking, and here, too, add it permanently to the proper config file:
sudo sysctl vm.swappiness=5
echo 'vm.swappiness=5' | sudo tee -a /etc/sysctl.conf
And you are done. By adding a swap file to your FileMaker Server, you have made it more robust.
Moving Forward in FileMaker 2024 with a Partner
Our team of FileMaker consultants can share the insights, best practices, and tools that FileMaker 2024 provides. To learn more about how we can help you build custom functionality and launch new features, contact our team to talk to a consultant.