Forecasting is an important way to monitor sales reps’ success, ensure that your company has enough products in stock to meet customer demand, and anticipate your company’s future revenue. Today, I’ll show you how to set up your forecast to meet your needs and learn Salesforce’s forecasting tool.
Let’s say your company realizes the full revenue of the Opportunity on the date the Opportunity is closed. You use the Amount field to track that revenue and want to see the breakdown of the Salesforce forecasting by a custom field called Shipment Method. You need individual sales reps to see the Opportunities they own. Supervisors need to see any opportunities they own and the opportunities the sales reps that report to them own.
Configuring Forecasts
To create your forecast, go to Setup > Forecast Settings. You’ll need to toggle the Enable Forecasts to on if it isn’t already.
You’ll have the option to create Forecast Types. However, before we do this, you’ll need to configure a few settings according to your organization’s needs:
Allow Forecast Submissions. This will allow your managers and owners to submit their forecast numbers at a point in time.
Enable Adjustments and Judgements. This will allow:
- Managers and/or opportunity owners to adjust their forecasts if they suspect different results
- You to display these adjustments as either a hover-over or column
- Managers to flag which opportunities they are confident will close during the forecast period.
Manage Forecast Rollups. This will determine how the numbers in your forecast roll up: either one, single categories, which, if selected, will indicate the values in each forecast category, or two, cumulative category rollups, will include the total sum of all opportunities in that forecast category plus the opportunities that are further along.
For example, let’s say you own the following Opportunities in a single forecast period:
| Opportunity | Amount | Forecast Category |
|---|---|---|
| 1 | $5,000 | Pipeline |
| 2 | $2,000 | Pipeline |
| 3 | $1,000 | Best Case |
| 4 | $3,000 | Commit |
| 5 | $4,000 | Closed Won |
Here’s how your forecast period would look in the different options:
| Forecast Type | Closed | Commit | Best Case | Pipeline |
|---|---|---|---|---|
| Single Category | $4,000 | $3,000 | $1,000 | $7,000 |
| Cumulative | $4,000 | $7,000 | $8,000 | $15,000 |
Choose Default Date Range. Use this to determine how the forecast is broken out (monthly or quarterly). You can also see where the forecast starts (if monthly, this can be set to between 15 months ago or 15 months in the future. If quarterly, you can set this to between 8 quarters ago and 8 quarters in the future) and how far into the from the starting time the forecast should extend. (If monthly, 1-15 months; if quarterly, 1-8 quarters.)
Show Quotas. This setting will determine if quotas appear on the forecast or not. I’ll discuss Quotas shortly.
Creating Salesforce Forecasting Types
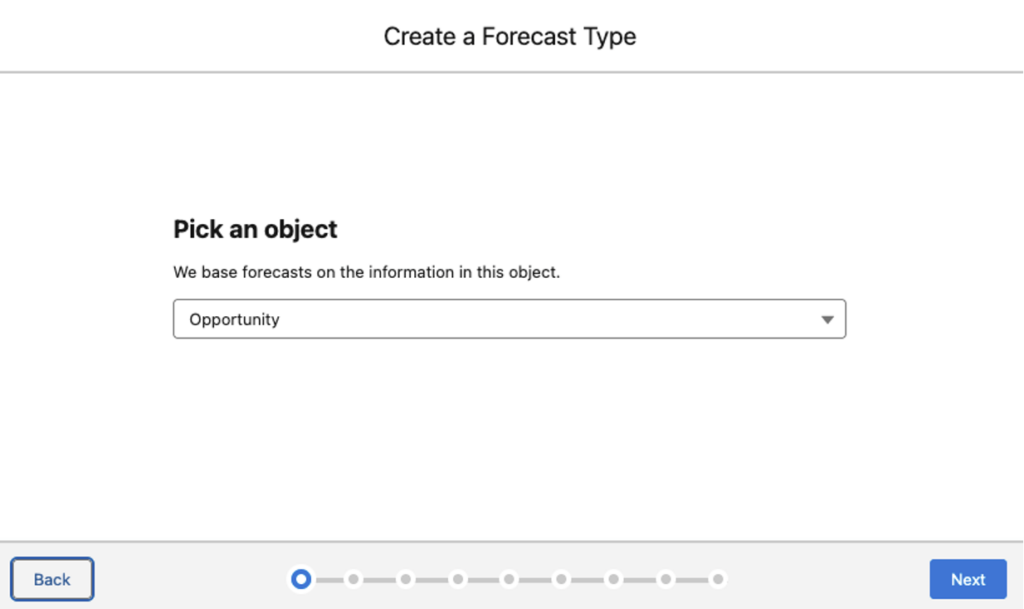
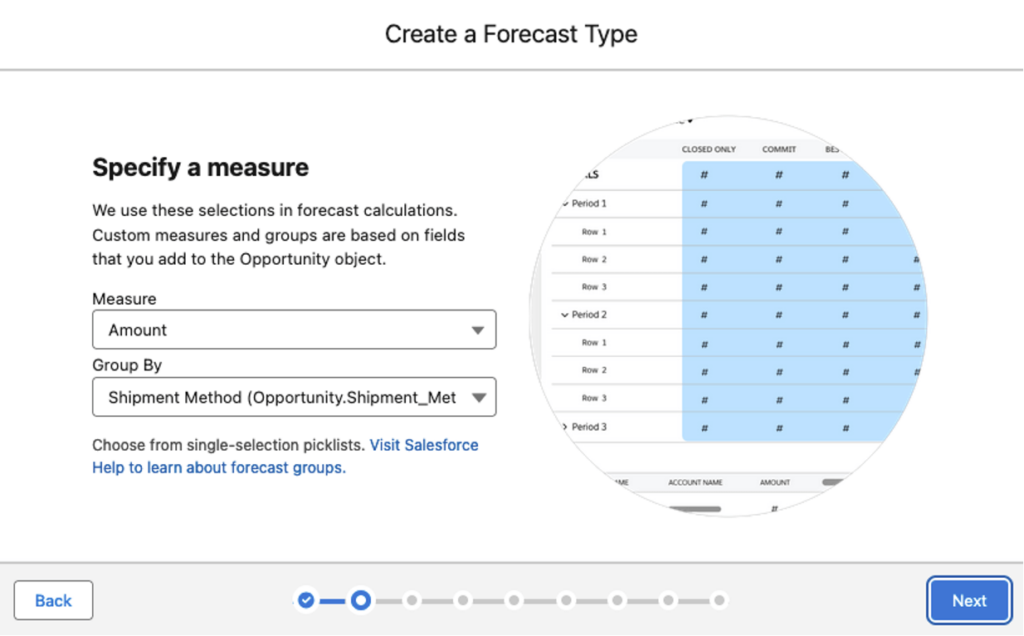
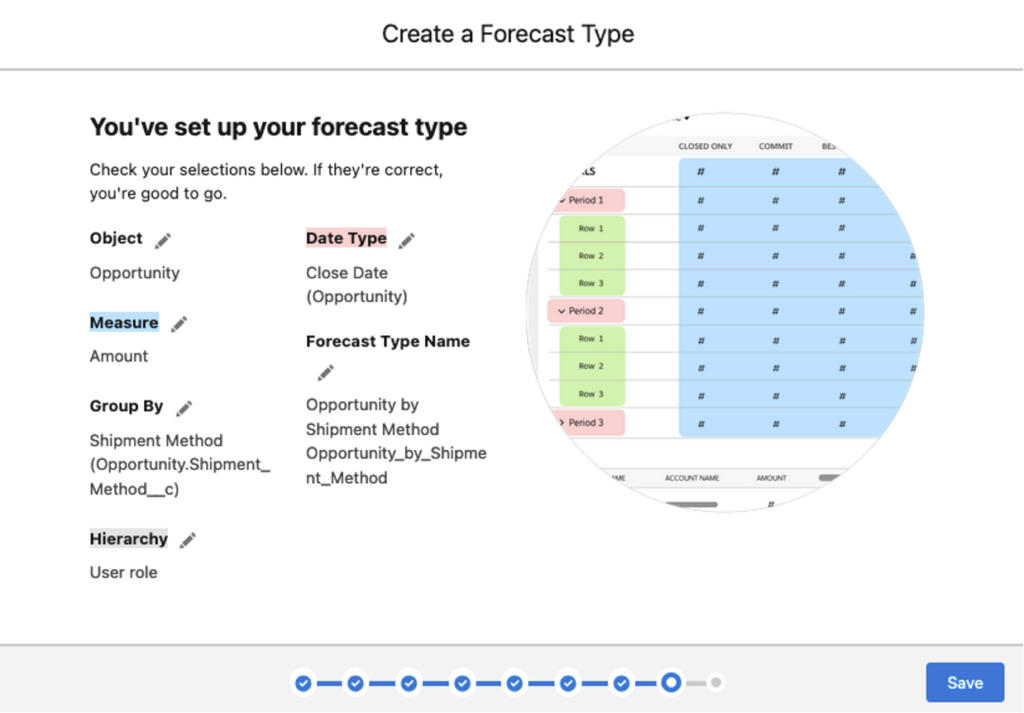
Once you’ve configured your forecast, you will be ready to create your forecast types. Start by clicking “Create a Forecast Type.” This will open a wizard for you to set up your forecast. Select Opportunity as the object you want to run the forecast on (Opportunity, Opportunity Product, or Schedule), then select the Amount field as your Measure (you can select any currency or number field on the selected object), and Shipment Method as your Group By field (you can select any custom pick list field on the selected object).
Specify Measures
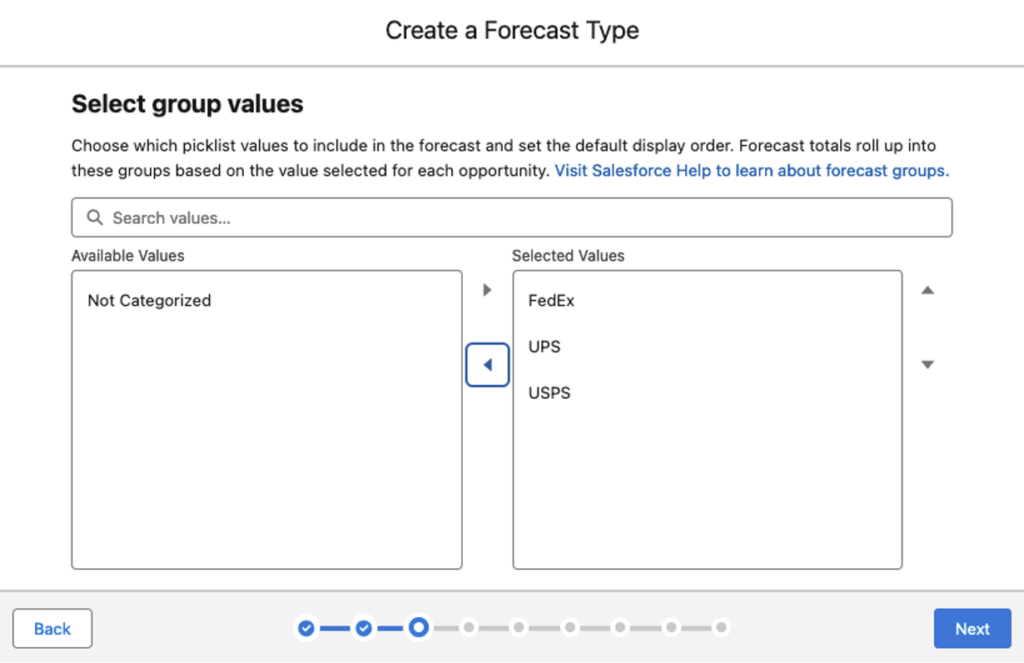
Select Group Values in Your Salesforce Forecasting
Because you chose to group, you can select which active pick list values to include and exclude from your Salesforce forecasting. The order of these values should appear on your pick list. The “Not Categorized” category is any record with no Shipment Method value.
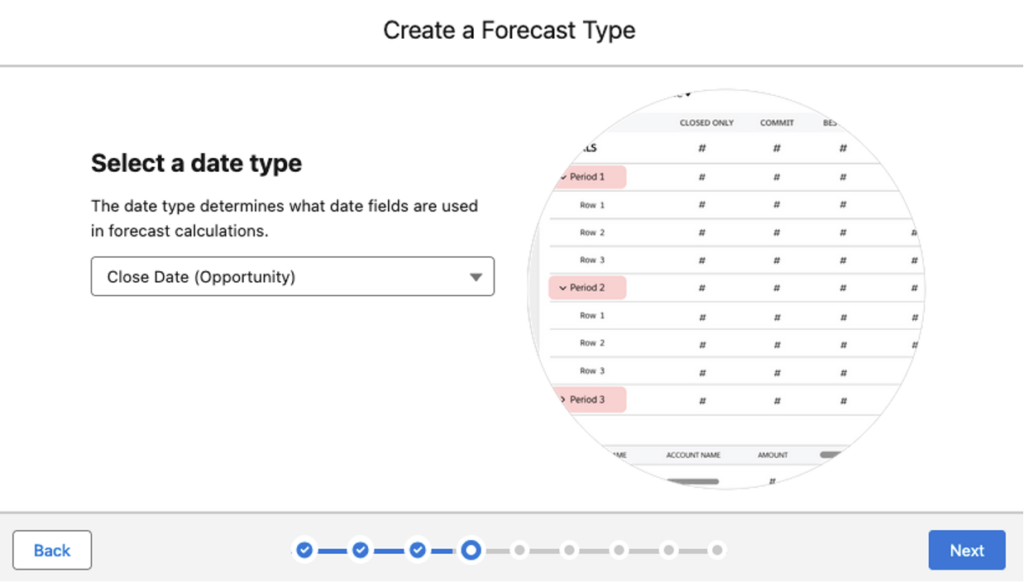
Select a Data Type
Next, select Close Date as your Date Type. (You can pick any Date field on your Opportunity object.)
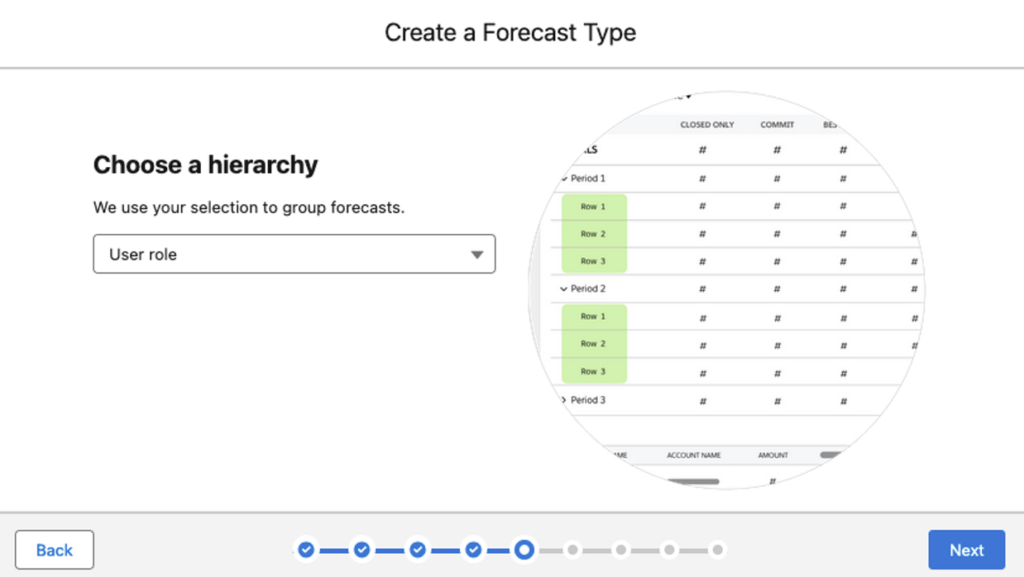
Choose a Hierarchy
Now, select User role as the hierarchy. This will ensure that supervisors see the Opportunities of the sales reps who report to them.
Specify Conditions in Your Salesforce Forecasting
You can then optionally specify up to three conditions, all of which must be true on an opportunity to include it in your forecast. In this case, we don’t want to apply any filters.
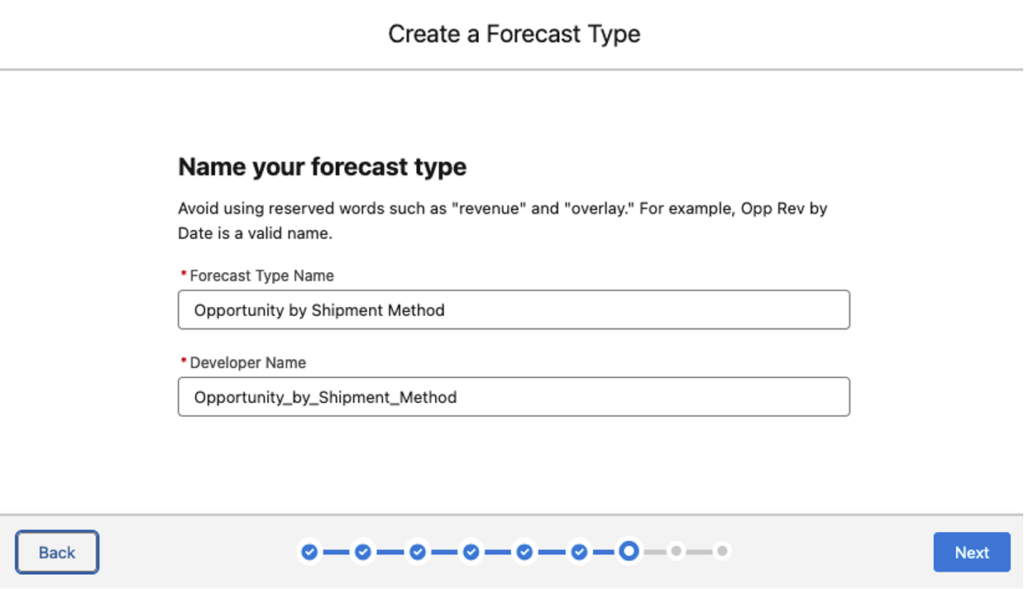
You’ll want to name your forecast type, Opportunity by Shipment Method.
Review Your Summary
Salesforce will then show a summary of your selections, which you will have the option to edit.
Customize Your Opportunity List
Lastly, you can specify the fields on the opportunity list that appear below your forecast and the order in which they are listed. Note that Opportunities will always show up below your forecast, regardless of whether you are forecasting Opportunities, Opportunity Products, or Schedules.
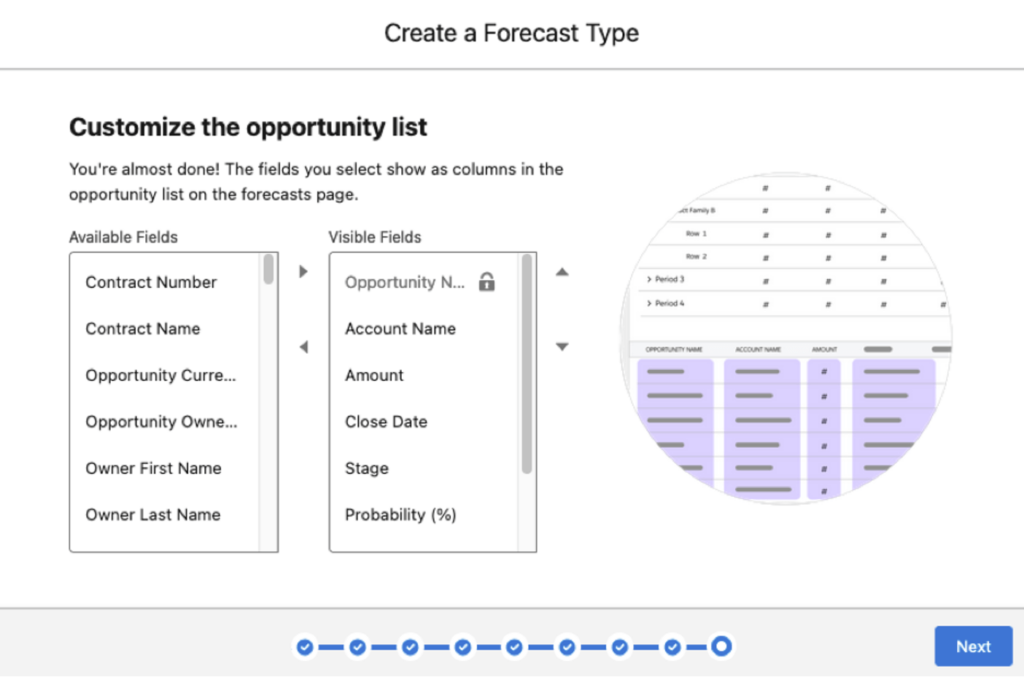
This will complete the wizard, but you must activate your forecast type for it to appear. You can have up to four active forecasts at one time.
Set Forecasts for Users
For each user needing to access forecasting, you’ll want to go to Setup > Users, edit each user, and check “Allow Forecasting”.
Set Up Quotas
If your company tracks sales reps’ Quotas, you can also track this in your forecast! Go to Setup > Forecast Quotas, then select the quotas you want to track. You’ll then set the Forecast Period, Forecast Type. If you’ve specified a Forecast Group for the Forecast Type selected, select the value for which you want to set the quota. If your Forecast Type has a Forecast Group, you can set quotas for each Forecast Group Value. I can give a sales rep a quota of $1000 for FedEx and $5000 for USPS if I need to.
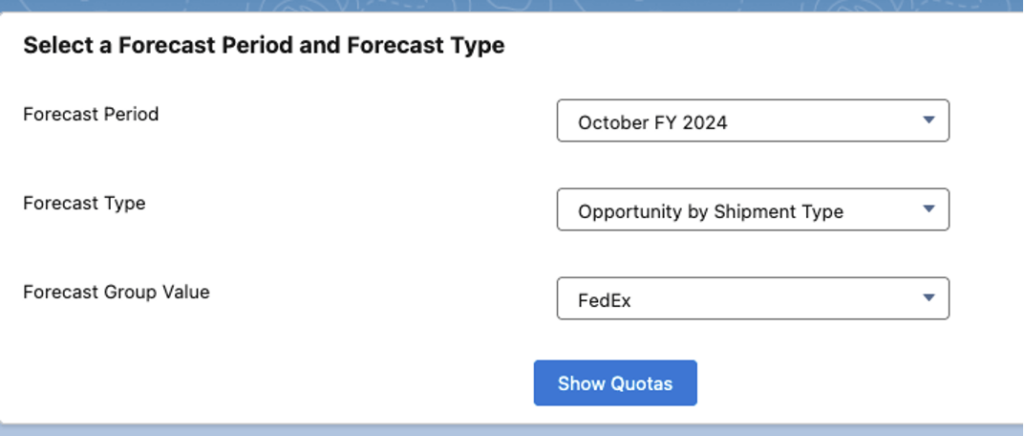
Next, press the Show Quotas button. You’ll need to set a Quota value for each sales rep. If multiple sales reps have the same quota value, select all their checkboxes, click Edit Selected Rows, and then input the Quota amount. Note that you’ll need to set new Quotas for each sales rep for each forecast period.
Orientation on the Salesforce Forecasting Tab
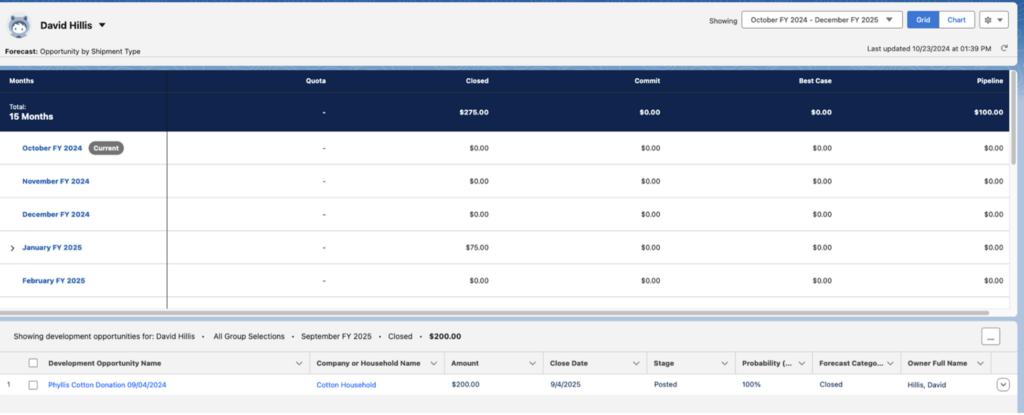
The user for whom the forecast runs displays in the top left. Managers can search for other users’ forecasts by clicking on it and typing the name into the drop-down.
Below the user name, Salesforce displays the name of the forecast type being viewed. If there are multiple active forecasts, these will appear as tabs.
Each row will display a month or quarter, depending on what has been selected. If you have grouped your forecast by a pick list, you can press the carat to drill down into the different values of the picklist.
Columns display Quotas if activated and forecast categories.
Your Opportunities will appear below the forecast table.
There is a refresh icon in the top right of the forecast table that you can use to recalculate the forecast if Opportunity data has changed since the forecast was loaded.
You can click on a cell to filter to display only the opportunities that meet that criteria (e.g., Best Case Opportunities for November 2024).
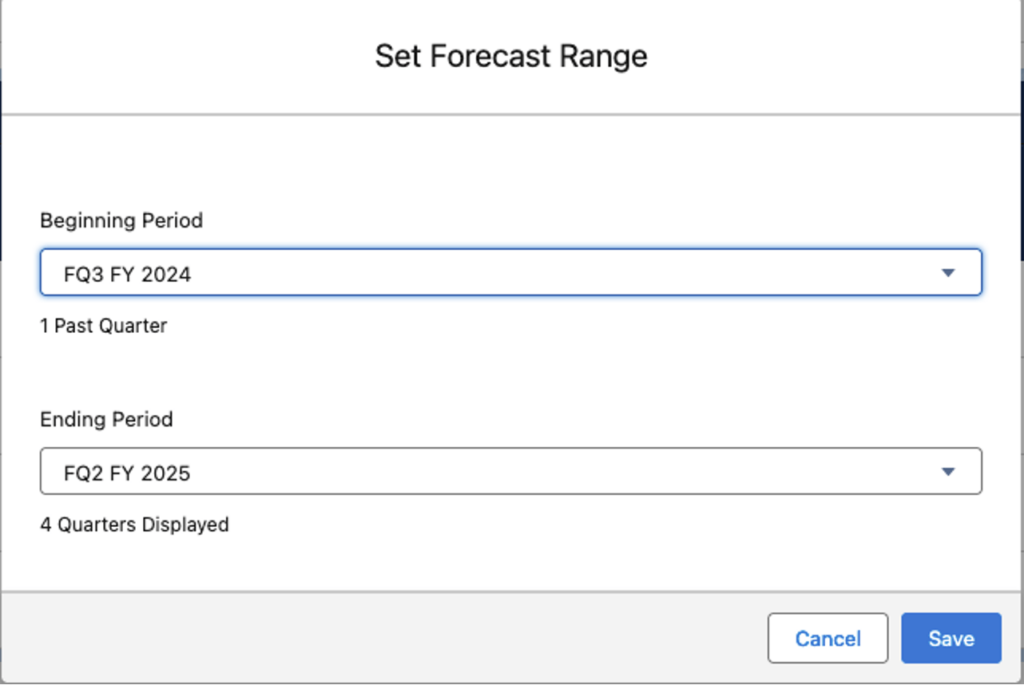
The user can specify the time range that the forecast displays by clicking on the Showing drop-down. Salesforce will then prompt the user to specify the beginning and ending periods of the forecast.
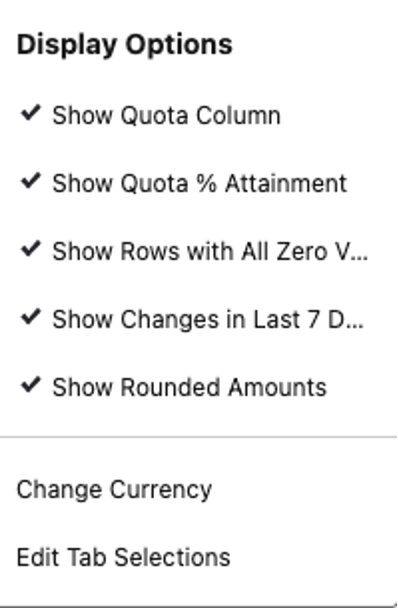
Pressing the gear icon will allow you to select:
The Chart button gives you the option to view two graphs:
- Weekly changes to the current forecast period
- This chart can be filtered to different values of the Group By picklist
- This chart can include or exclude adjustment data.
- Trends, displaying the current forecast versus previous periods
- This chart can be filtered to different values of the Group By picklist
- This chart can include or exclude adjustment data.
Note that these display the current forecast period data regardless of the time period you have selected in your grid view.
Partner With Experts to Maximize Your Salesforce Forecasting Success
Salesforce forecasting is a powerful process that can transform your sales team’s operations, but setting it up correctly sometimes requires both technical expertise and an understanding of sales processes.
As a Salesforce Consulting Partner with 15 years of experience, we’ve helped hundreds of sales teams optimize their forecasting workflows to drive better decision-making and increase revenue. Our deep knowledge of Salesforce’s capabilities and our hands-on experience across various industries allow us to tailor forecasting solutions that align perfectly with your team’s unique needs.
Whether you’re just getting started with Salesforce forecasting or looking to refine your existing setup, our team is here to help. Reach out to us today to speak with one of our consultants and discuss how we can enhance your sales operations with proper forecasting implementation.