Often, a business needs its CRM to populate emails with data from related records. Maybe your Support Agents need to send a list of a Case’s impacted products to Operations. Or maybe your Sales Reps need a list of new Opportunities emailed to them daily. Maybe supervisors need to get a list of their new supervisees every month.
Leveraging Flows to Create Emails with Lists of Related Data – No Code Necessary
In Salesforce, Visualforce Email Templates were traditionally the best method to do this, but these can be very challenging to build and maintain, as they require coding. However, you can leverage Flows to create emails with lists of related data with no code!
Let’s say when an Opportunity is set to Closed Won, your company wants its CRM to automatically send an email to Shipping that includes a list of the products on the Opportunity and their quantity, so Shipping knows what needs to be shipped out.
Creating a Record-triggered Flow
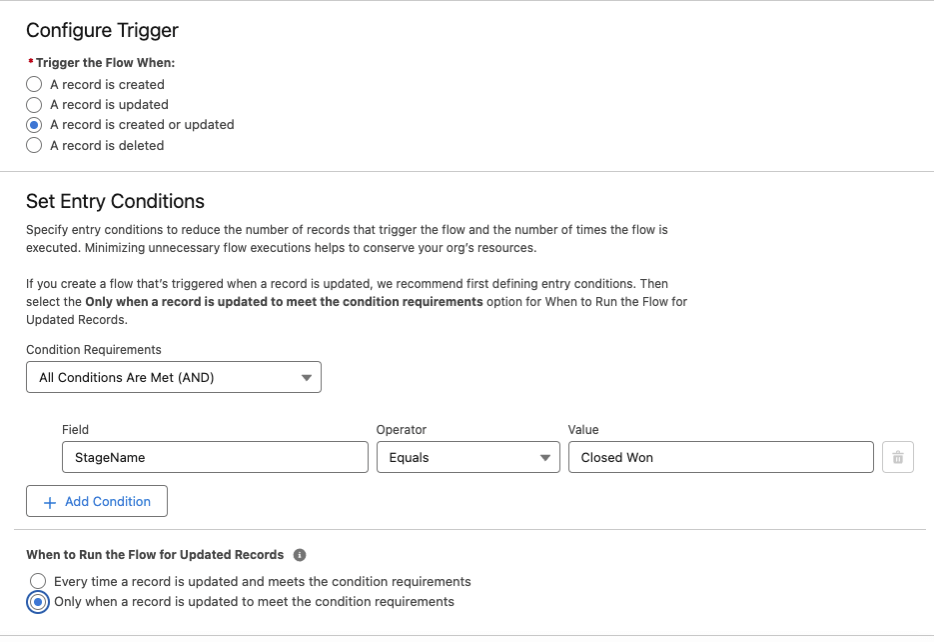
To do this, we’ll want to create a record-triggered flow for Opportunities that have the following entry criteria:
We’ll want to optimize the Flow for Actions and Related Records, as we’re going to send an email.
Adding a Get Element
Next, we’ll want to pull the Opportunity Products associated with the Opportunity that triggered our Flow. To do this, we’ll add a Get element with the following filter conditions:
Be sure to set the Get element to store all records that are returned, not just the first one!
Adding a Decision Element
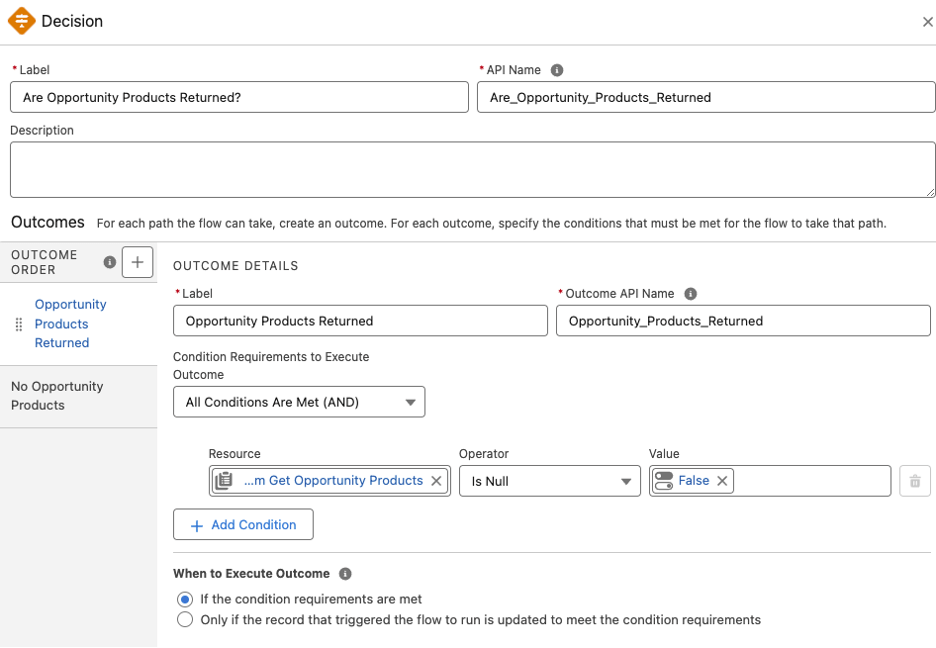
To make sure we handle instances where the Opportunity is closed with no products gracefully, we’ll now add a Decision element to make sure that there are Opportunity Products—if there aren’t, there’s no reason to contact Shipping. To do this, we’ll create a Decision element.
If our flow goes down the default path (No Opportunity Products), it will end. However, assuming that Opportunity Products are returned, we’ll want the email to go out.
Creating the Email Body
Now, let’s create our email body.
Creating the Necessary Resources
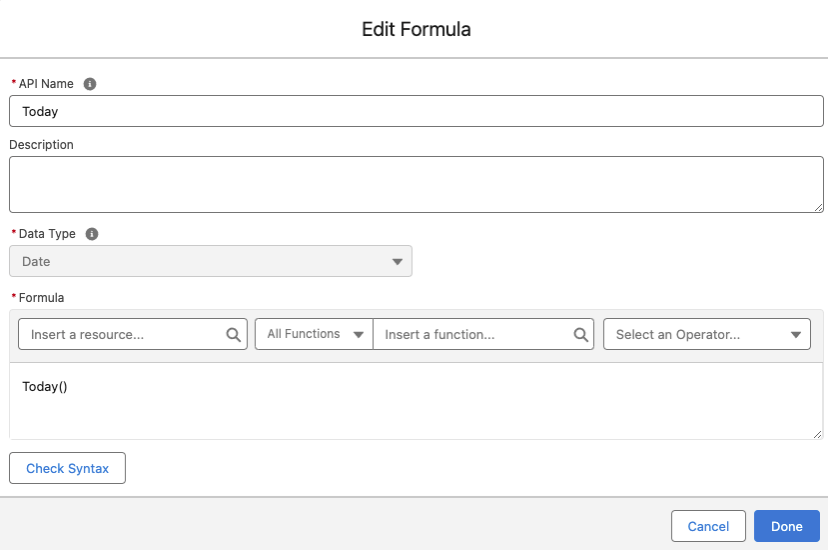
We’ll first create a Formula resource for today so that we can include when the Opportunity was closed.
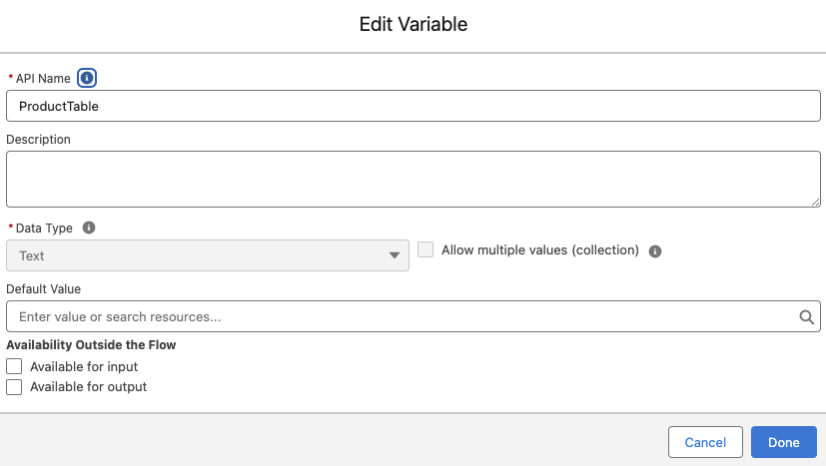
Next, we’ll create a Text Variable resource for our list. Its default value will be blank.
Building a Text Template
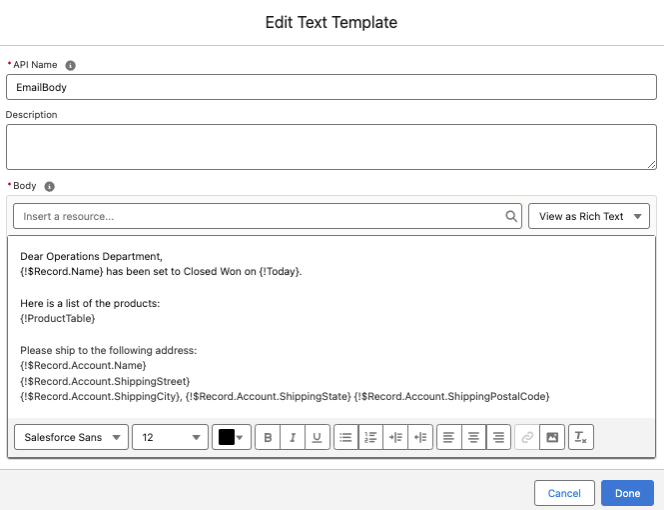
We can get the rest of the data from the Opportunity that triggered the flow, so we’re now ready to build out a Text Template resource. It will look something like this:
Building a Loop Element
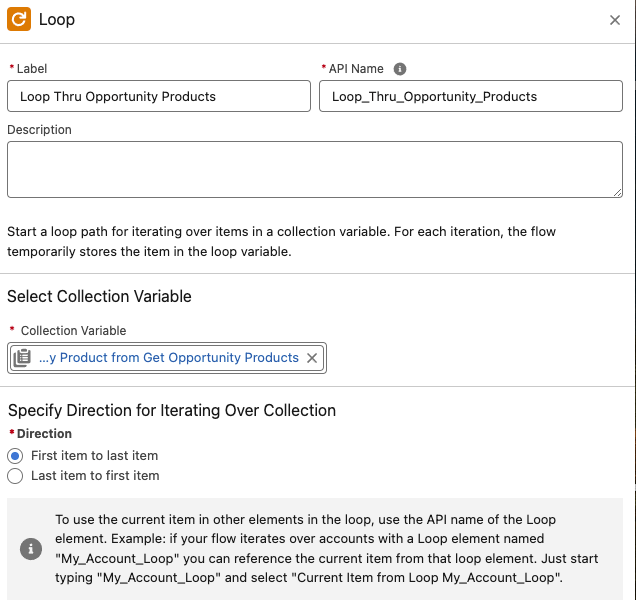
If we were to send the email in our flow once we confirm that Opportunity Products were returned, our ProductTable variable would be blank. To populate our ProductTable, we’ll need to review all of the Opportunity Products that were returned in our Get element. We’ll need a Loop element for that!
Adding the Opportunity Product to the List
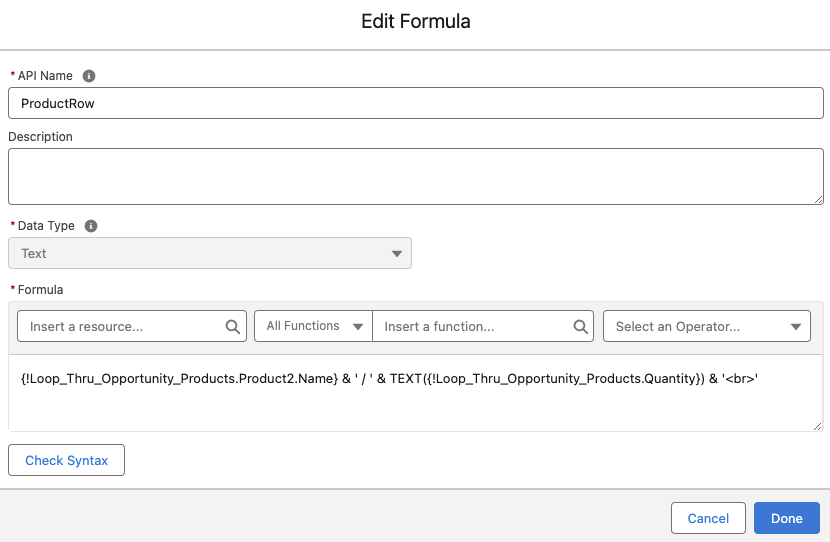
We want each Opportunity Product to be a row on our list. To do this, we’re going to create a new formula:
Let’s break this formula down:
- First, we’re going to take the current Opportunity Product in our loop and populate the Row with that Opportunity Product’s Product Name.
- Next, we’re going to separate it with a “/” symbol. After that, we’ll take the current Opportunity Product in our loop and populate the Row with the quantity.
- Because that’s a number and we’re generating text, we’ll need to convert that to field to text.
- Lastly, we’re going to add the text <br> at the end. This is an HTML tag that will insert a line break. I know; I said no code. It’s actually four characters of code, but I think we can round down.
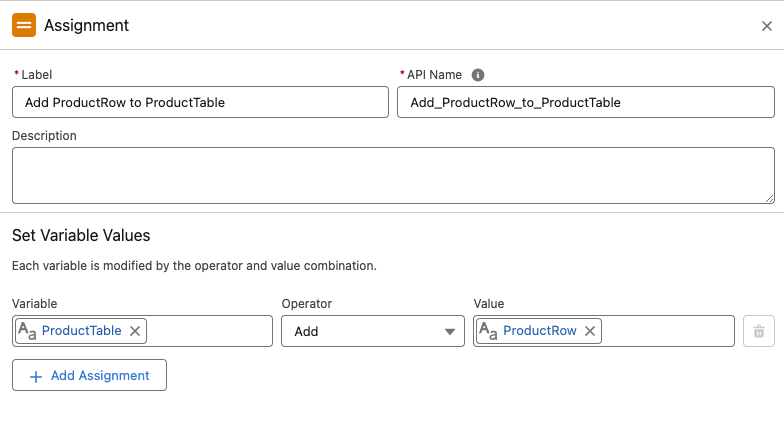
Now that we’ve built that formula, we need to make sure we add the ProductRow to the ProductTable for each Opportunity Product in our collection. To do this, we’ll add an Assignment element inside the loop. In this assignment, we’ll use the “Add” operator to add ProductRow to ProductTable.
Building Out the Send Email Action
The last thing to do is to build out our Send Email action after the loop. To do this, we’ll want to make sure we populate the following data:
- Body = EmailBody
- Recipient Address List = Shipping Department’s email address
- Rich-Text-Formatted Body = True
- Subject = New Shipment to Fulfill: {!$Record.Name}
- Use Line Breaks = True
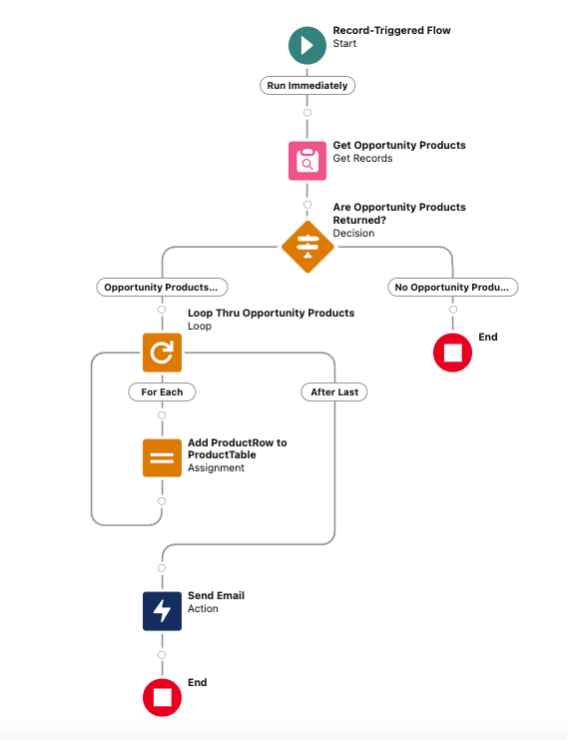
Your flow should now look something like this:
How the Flow Runs
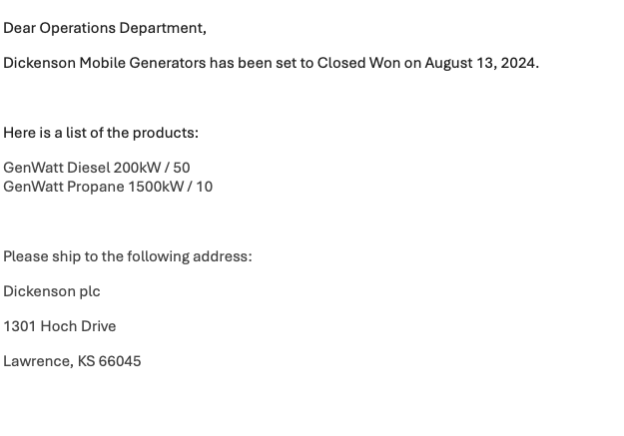
Let’s look at how this flow will run: We have an Opportunity that has two Opportunity Products: GenWatt Diesel 200kW (50 units) and GenWatt Propane 1500kW (10 units). Its stage is currently Verbal Commitment. Our Sales Rep gets the signed contract and sets her Opportunity to Closed Won.
The Opportunity now meets the conditions for our Flow to fire! The Flow queries for Opportunity Products associated with the won Opportunity. Salesforce returns two: Opportunity Product 1 (50 GenWatt Diesel 200kW) and Opportunity Product 2 (10 GenWatt propane 1500kW).
The decision element determines that Opportunity Products were found, so Salesforce loops through them.
First, the loop runs with Opportunity Product 1. While the loop is on Opportunity Product 1, ProductRow’s value is “GenWatt Diesel 200 kW / 50” (and a line break). The Assignment element now adds “GenWatt Diesel 200 kW / 50” (and a line break) to ProductTable’s value, which is blank. Thus, ProductTable’s value is now “GenWatt Diesel 200 kW / 50” (and a line break).
Now, the loop runs with Opportunity Product 2. While the loop is on Opportunity Product 2, ProductRow’s value is now “GenWatt Propane 1500kW / 10” (and a line break). The Assignment element adds this value to ProductTable’s value, which is “GenWatt Diesel 200 kW / 50” (and a line break). ProductTable’s value is now:
GenWatt Diesel 200 kW / 50
GenWatt Propane 1500kW / 10
There are no other Opportunity Product records, so the loop ends and Salesforce sends the email with the list of Opportunity Products.
Voila!
Further Customizing Your Salesforce Org and Flows
This is just one example of how our team of Salesforce experts helps organizations achieve more with their Salesforce org. If you need insights on how to do more on the platform, our team of experienced architects can help. Contact us to talk with a consultant today.
