Introduction
The original Linux version of FileMaker Server, released as 19.1 and updated in 19.2.1, ran on CentOS 7. With FileMaker Server 19.3.1 (released on June 23, 2021), the supported Linux Operating System is now Ubuntu 18.04 LTS.
Why the Switch from CentOS to Ubuntu?
CentOS (Community Enterprise Operating System) is derived from Red Hat Enterprise Linux (RHEL). Traditionally CentOS has prioritized stability over technical novelties; it would get updated only after the other operating systems in the Red Hat family had already applied them for a while. By receiving updates last – after they have been battle-tested in the upstream OSes: Fedora, CentOS Stream, and RHEL – there was an inherent stability and predictability that made CentOS a perfect fit for servers. That is why it was chosen for FileMaker Cloud and the original FileMaker Server 19.1.2 back in October of 2020.
A recent decision by Red Hat to reposition its two CentOS versions by dropping CentOS and only keeping CentOS stream means that the only remaining CentOS will start receiving updates ahead of its flagship Red Hat Enterprise Linux (RHEL) instead of after. That decision has created some uncertainty about its future and has taken away some of that promise of stability that comes from being conservative in adopting changes.
That change has been one of the driving factors for Claris in prioritizing Ubuntu as the main platform for FileMaker Server.
There are other considerations for possible future features such as containerized deployment that make Ubuntu the better option.
The CentOS deployment option is now officially deprecated but remains supported on FMS 19.1.2 and 19.2.1.
As always: feel free to reach out to me on community.claris.com with any questions or suggestions. My community handle is wimdecorte.
Why No Desktop?
Claris supports using either the Ubuntu Desktop version or the Ubuntu Minimal (server) version. We very strongly favor using only the Minimal (server) version: Linux servers are best run without any desktop UI installed on them.
Having fewer packages to maintain translates into more robustness, and fewer required resources (memory, disk space, etc.), and most importantly: better overall security.
Choosing the desktop version because it is more convenient in the short term is a deployment faux-pas. And insisting on a Desktop for your Linux server may just alienate the IT department you are trying to get cooperation from.
That leaves us with the command line to move around and get things done. We realize that for many, that is a daunting prospect because it is unfamiliar. But we can assure you: it is not half as scary as you may think it is. In this document, we will highlight useful commands to help you master this new operating system. And having a good set of tools helps tremendously.
Two specific tools can help you along: a good terminal emulator that lets you save hosts and settings and a text snippet/text expander tool that you can use to quickly access those useful commands without having to learn them by heart. You will see such a tool in action in the next sections.
Connections to your Linux server will be made through a Secure Shell connection (SSH) so that you can access the command line environment of your server from your machine. This is a similar concept to a remote desktop connection that you are no doubt familiar with.
A typical command line connection to your Linux server would be initiated like this:
ssh ubuntu@server_dns_name
which will prompt you for the Ubuntu password
If your Linux server is on AWS, you will need to include the path to your private key like this:
ssh -i /path/to/private-key.pem ubuntu@server_dns_name
Similarly, to move files to and from your Linux server, you will be using Secure Copy (SCP) or SSH File Transfer (SFTP, not to be confused with FTPS, which is the secure version of FTP). Do not be tempted to enable other forms of file-sharing such as the SMB protocol, as those will just add to your server’s security maintenance.
If your main workstation is macOS, then many of the command lines to do SSH and SFTP are already built into your operating system. On Windows, the go-to utilities to download and install are PuTTy and PuTTY SCP (PSCP) from https://putty.org/.
The Installation Process
This writeup uses an AWS virtual machine, which makes installing Ubuntu as easy as picking the right Amazon Machine Image (AMI).
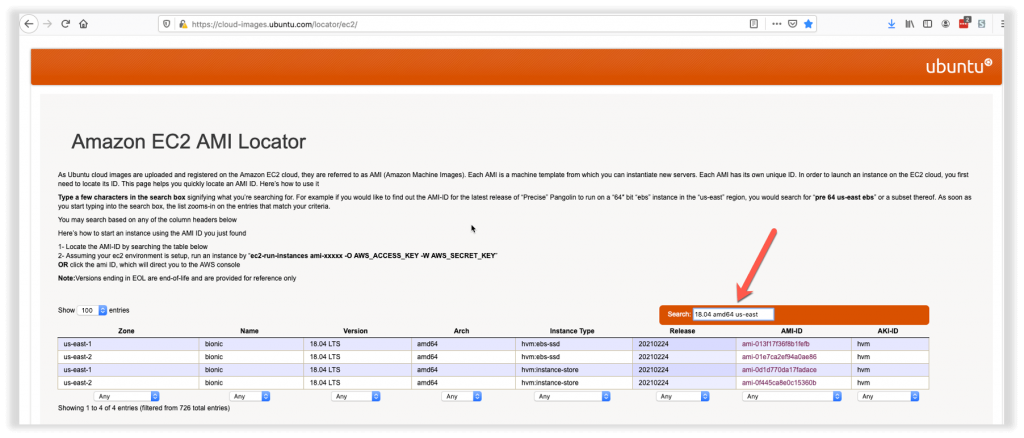
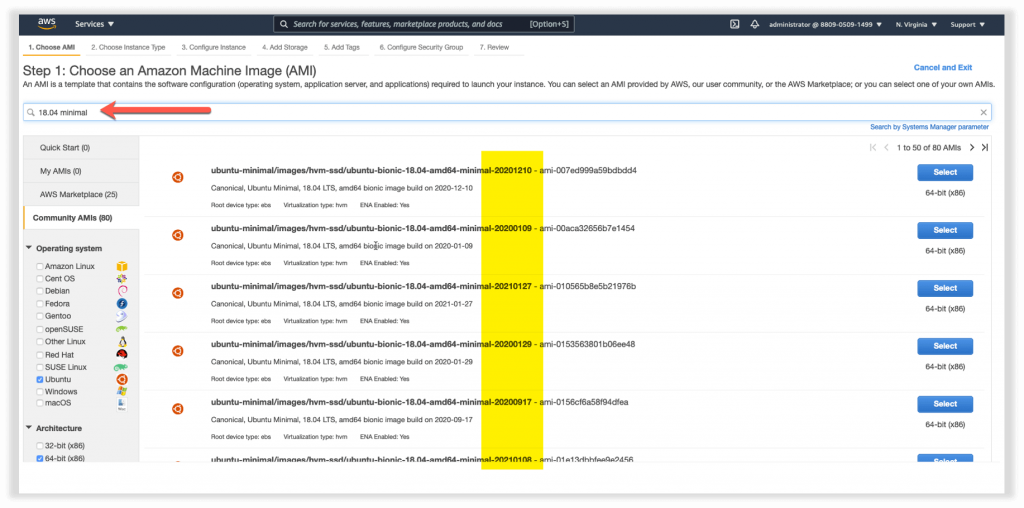
You can also go straight to the Community AMIs section in AWS, select Ubuntu and 64-bit and further reduce the list by filtering on 18.04 minimal. The list will then still show a lot of AMIs, so pay attention to the release date at the end of the AMI name when you pick one. The selection list on the Ubuntu site itself is easier.
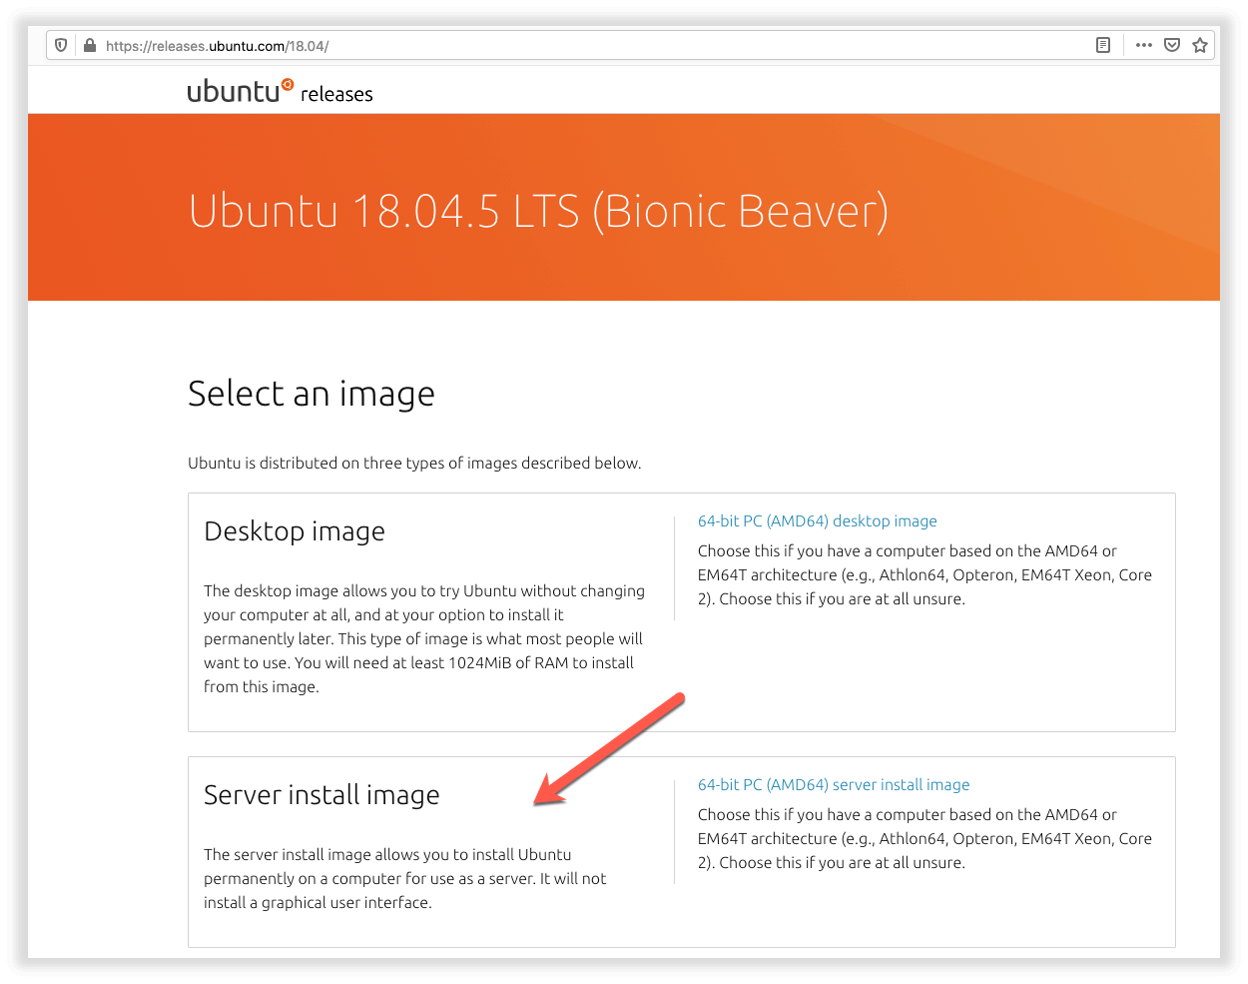
If you want to install Ubuntu yourself on physical hardware or in your own virtualization environment (VMware, VirtualBox, etc.), then download the Server Install Image ISO for version 18.04. Follow the links provided here.
The link will take you to the most recent ISO disk image to install from:
Minimal?
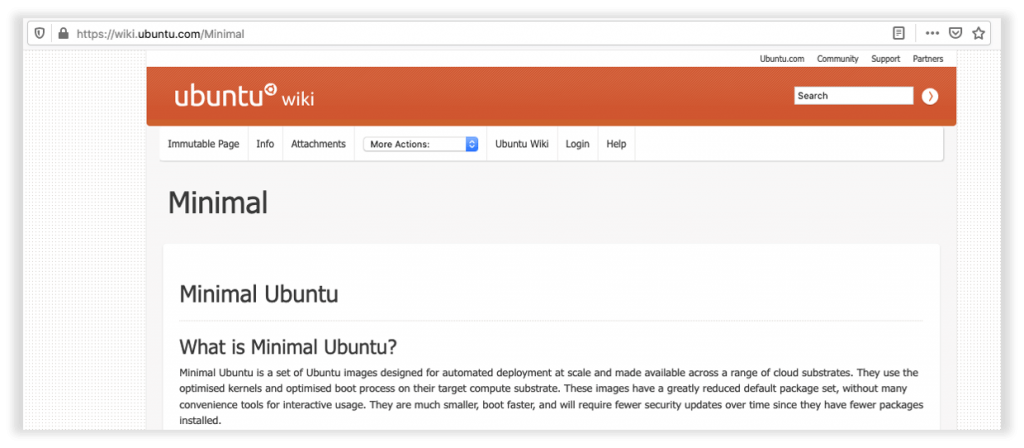
The ideal Ubuntu version is 18.04 Minimal, which doesn’t mean version 18.04 and up. It means the Minimal version of 18.04. The minimal version does not have all the desktop bells and whistles; it is the version of Ubuntu geared towards stable, secure, and reliable server deployments.
LTS?
Every two years, Ubuntu releases a Long Term Support version. LTS releases are the ‘enterprise grade’ releases of Ubuntu and are used the most. The overwhelming majority of all Ubuntu installations are LTS releases, making perfect sense for Claris to make this the supported version. The Ubuntu release cycles are documented here.
Some Preliminary Notes
Some of the commands that you will see throughout this guide will use sudo in front of them. Sudo means “superuser do,” which allows the command that follows to be run under higher privileges than the account you are logged in with. When you try a command, and it fails because it requires those elevated rights, it will typically tell you so that you can try again with sudo in front of it.
All Linux distributions use a Package Manager to keep track of software that you can install and available upgrades. “apt” is the command line package manager that Ubuntu and other Debian-based Linux versions use. Whenever you need to install something, you will invoke apt.
Like most operating systems, Ubuntu can use a software firewall. The most common one is called firewalld. That is the one that the FileMaker Server installer will expect and configure.
Correct Version of Ubuntu
First, check the version of Ubuntu and verify that it is 18.04, the version required by FileMaker Server. One of the commands that will let you do that is:
lsb_release -a
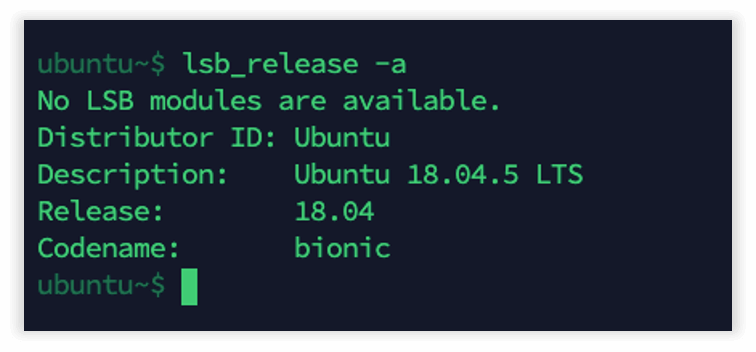
If you do not have the required version of Ubuntu (and the latest LTS 20.04 is NOT supported), then make sure to follow the steps outlined above to grab the supported version.
Next, check to see if your machine has firewalld installed:
apt list --installed | grep firewall
If it does not, then the command will return empty, which is expected on a brand new operating system install since firewalld is not part of the default packages.

If the firewall is installed, you will see a confirmation (look for firewalld):

While not strictly necessary since the FileMaker Server installer will take care of it, I tend to install firewalld myself.
The other application that I add immediately is unzip.
This command will install both:
sudo apt -y install firewalld unzip
If you get an error that firewalld is not available, then you may need to update the available packages first on your machine and run the available upgrades:
sudo apt update && sudo apt upgrade
Also on my list of must-have tools is a text editor that I am familiar with and Ubuntu has my favorite text editor nano pre-installed.
(I know Linux aficionados will call me a wuss, but I just don’t like the built-in vi text editor.)
For a standard FileMaker Server installation, you won’t need a text editor. Still, it comes in handy to quickly review log files or for more heavy-duty work such as configuring custom OAuth providers.
Ubuntu uses the UTC time zone by default; if needed, you can adjust the time zone for your server at this time:
sudo timedatectl set-timezone America/Toronto
Getting the FileMaker Server Installer to the Server
The FileMaker Server installer will typically be a zip file that you download from your Claris Electronic Software Download page. There are a number of different ways to get the file to your server.
I use a tool called Termius since I have many Linux servers and IoT devices to connect to. It also lets me store presets for all my servers (and synchronize them across my multiple laptops and mobile devices).
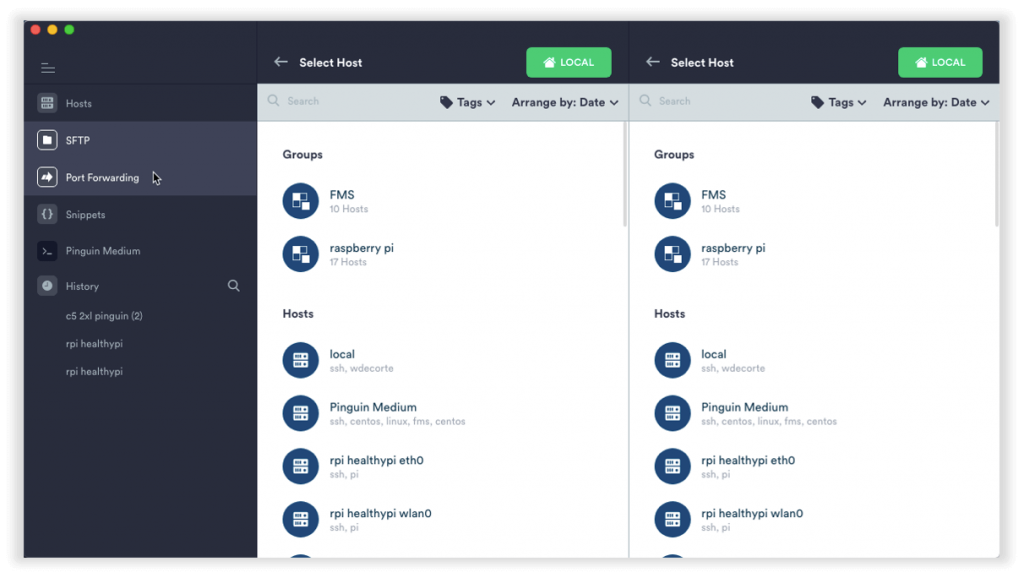
Termius has support for SSH, and it has a very nice SFTP interface built into it. That makes the task of moving a file as simple as selecting “Local” on the left and my server on the right and just copying the file between the two.

By default, this would put the file in the home folder of the ubuntu user account on the Linux server.
In the Linux terminal, you can always type the following command to find out what directory you are in:
pwd
(which stands for print working directory)
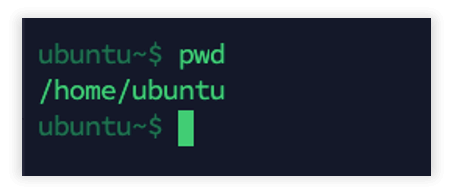
From wherever you are, you can always get to the logged-in user’s home folder by using this command
cd ~
One alternative way to move files around – and one that I often use – is to use Amazon S3 to store the installer. Since I will use S3 to make my FileMaker Server store some offsite backups, I tend to install the AWS S3 command line toolset immediately after installing Linux. Instructions on how to this are located here. You will need to have unzip installed already at this point.
The commands required to install AWS CLI are already a part of my library of snippets in Termius so that I don’t have to remember them or look them up: all I have to do is paste or run the snippet.

With the AWS command line tools installed, I can grab the installer from one of my S3 buckets and drop it in the folder where I am currently located, like so:
aws s3 cp s3://my_bucket_name/FMS_installer.zip ./
As an added bonus, if your FileMaker Servers are AWS EC2 instances, then moving files around between AWS services like EC2 and S3 are *very* fast.
To verify that the FileMaker Server installer made it through ok, you can ask for a list of files. I tend to use the command below since it also shows me the file sizes in a nicely readable format:
ls -alh
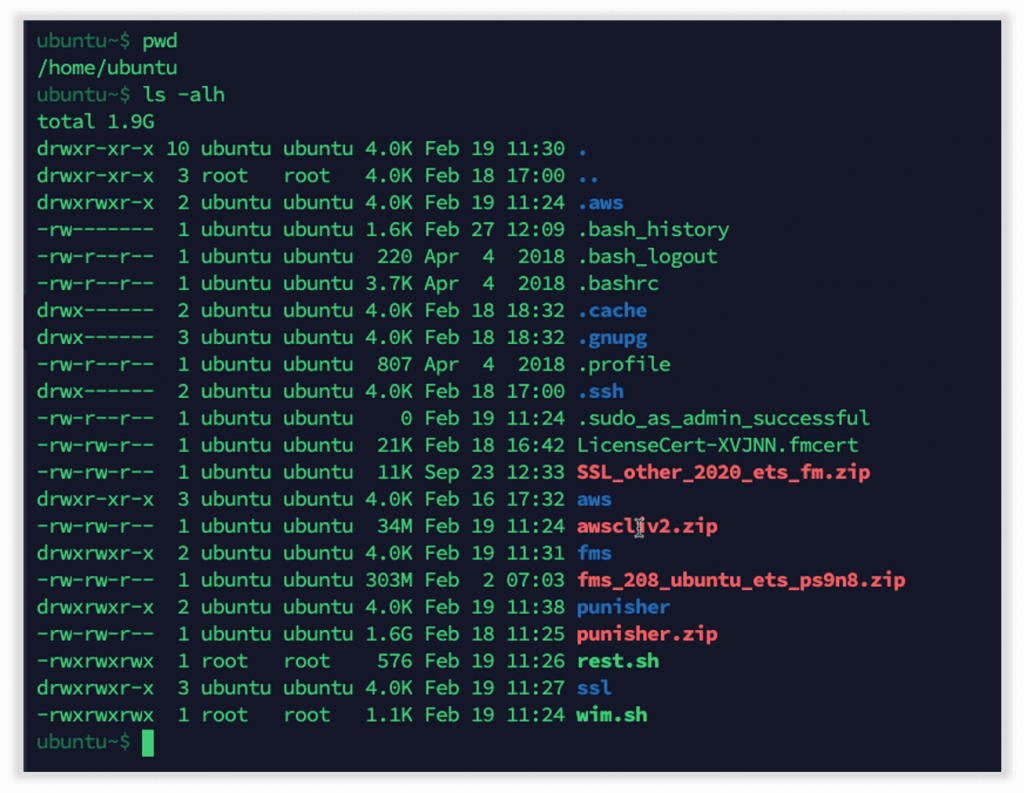
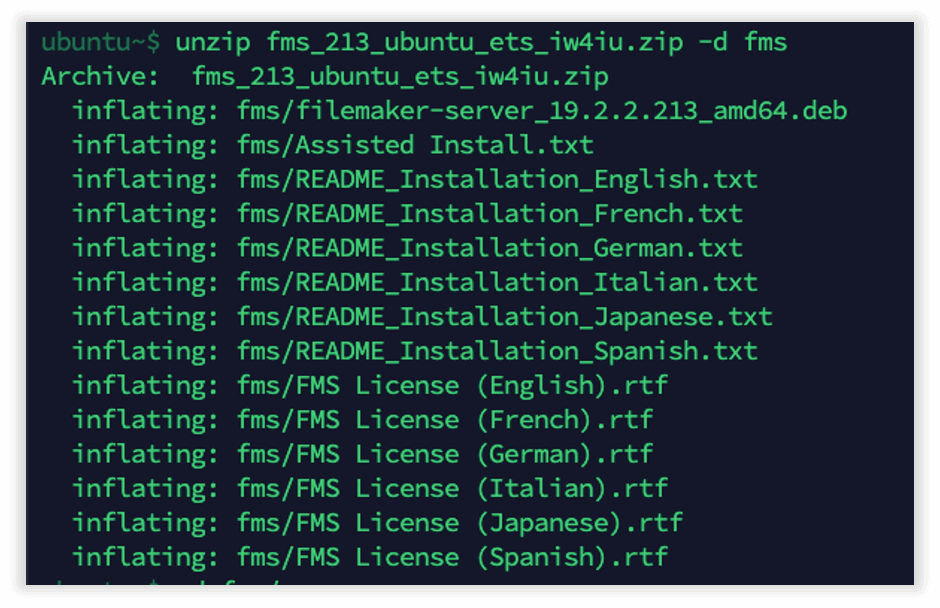
Unzip the installer to reveal the .deb file, which is the actual installer package. The unzip command below will place all the extracted files in the folder where the zip file is. If you want to have the files placed in a subfolder, use the -d command parameter and specify the name of the folder (the command will create it for you).
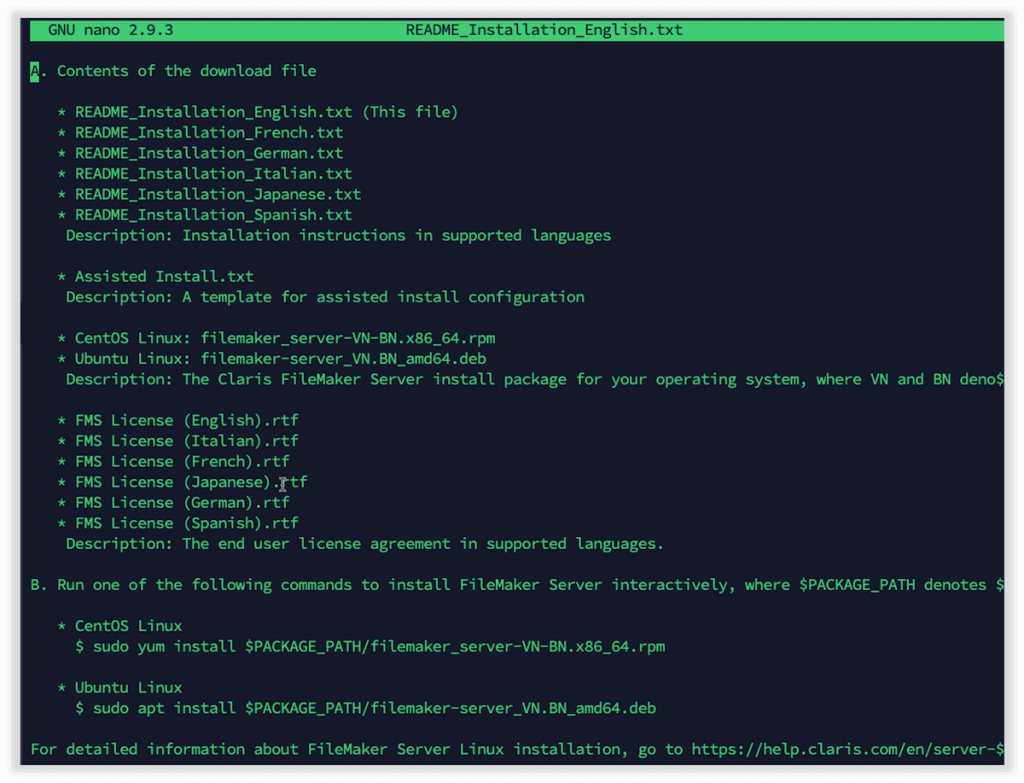
The README file has instructions on how to execute the deb package and how to use the Assisted Install file to limit the number of interactions with the installer. This is a good use for your favorite text editor.
To read the file:
sudo nano README_Installation_English.txt
This brings up the nano text editor, where you can navigate around with the keyboard arrows. When you are done, hit ctrl-x to quit the editor.
Installing FileMaker Server
Before you install, run this command to make sure that Ubuntu is up-to-date on all available packages:
sudo apt update
As per the README file instructions, run the following command to install FileMaker Server from the folder where you have unzipped the deb file into. Note that the deb package’s actual file name may be slightly different depending on what version and build number are current at the time you do this.
sudo apt -y install ./filemaker-server_19.3.1.47_amd64.deb
If you want to make use of the assisted installer (to preset some installation choices such as master or worker, admin console account name, password, and PIN), you can prepend the command with the folder location of that text file:
sudo FM_ASSISTED_INSTALL=/path/to/folder apt -y install ./filemaker-server_19.3.1.47_amd64.deb
The install command will download and install all the dependencies that FileMaker Server needs. Unless you are using the Assisted Install file, there are a few points during the installation that will require input from you:
Agreeing to the License Agreement:

Choosing between a single or master installation and a worker machine installation:

Setting up a username, password, and PIN for admin console access:

At the end of the install process (which typically takes no more than a minute or two), you’ll see a confirmation like this:

But do scroll up through the output to check if any errors were reported along the way. “done.” does not automatically mean that all is well. This is one of the main reasons we always capture the output in a log file.
Pay particular attention to anything in this section:
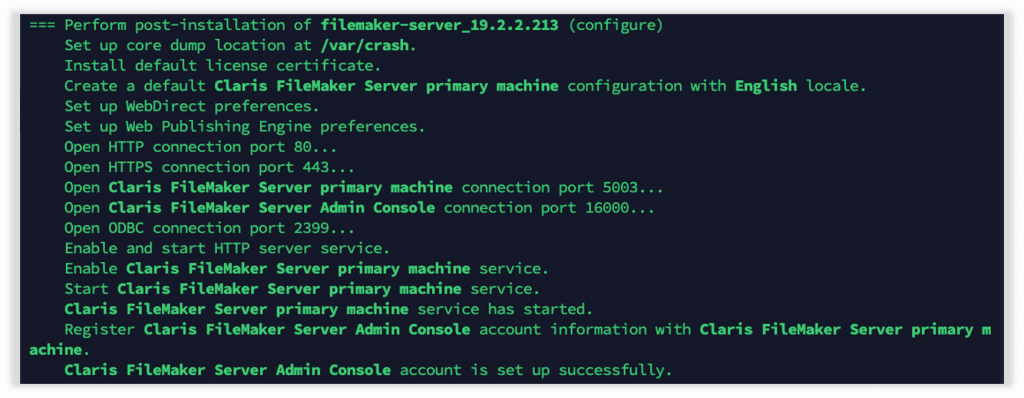
If there are any issues with starting the web server, they will be noted there.
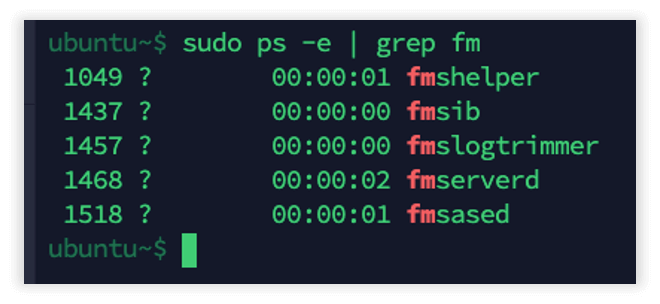
After installation, always check to see if the FileMaker Server services are running and also if the web server is running since you’ll need that for the admin console. Ask the system for a list of running processes (ps) and search that list for three particular strings: fm for the FileMaker-related services and apache for the web server ones and fac for the admin console:
sudo ps -e | grep -e fm -e apache -e fac
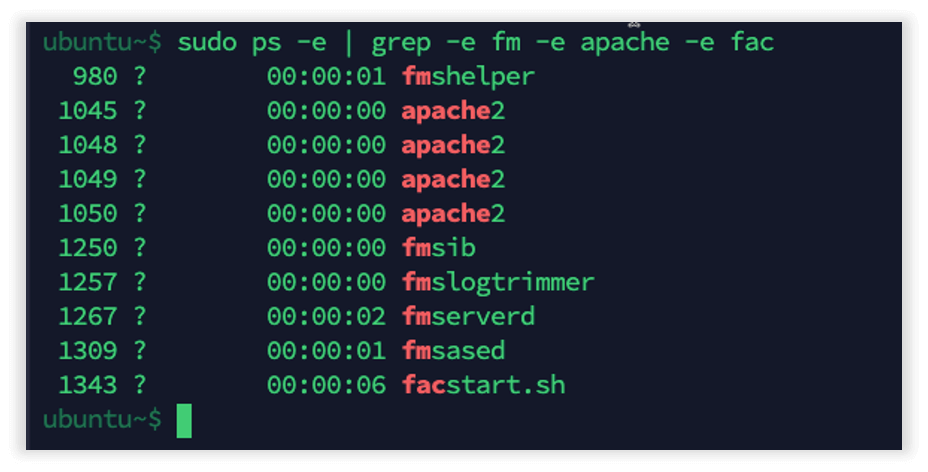
If all is well, there should be several apache2 web server processes and all the relevant FileMaker Server standard processes: fmserverd for the database engine, fmshelper and fmslogtrimmer for the admin part, fmsib for incremental backups, fmsased for the server-side scripting engine (schedules and PSoS), and facstart.sh for the admin console. If you do not see this initial list, then check again after the reboot discussed below.
Note: FileMaker Server on Linux uses Avahi to allow for mDNS connectivity on your network. That is the same functionality that is provided by Bonjour on Windows and macOS FileMaker Server deployments. If you do not need Bonjour-like functionality for your FileMaker Server, then you can stop the Avahi service and disable it from starting automatically. Disabling it has no effect on FileMaker Server:
sudo service avahi-daemonstop sudo systemctl disable avahi-daemon
During the installation process, you will have noticed that FMS suggests a reboot:

At this point, only the Sample file is being hosted, but good habits are important, so we’ll tell FileMaker Server to close the file first.
fmsadmin close -y -u -p <you admin username> -p <your admin password.

Followed by:
sudo reboot now
Wait a few minutes, then log back in and run the two commands to check if the FileMaker-related services are up and running with the ps command listed above.
Getting to the Admin Console
At this point, we have a working FileMaker Server installation, but FileMaker Server does not yet have an SSL certificate installed. Getting to the admin console may be different depending on your preferred brow. The trick is to get past the initial security warnings until you can get your custom SSL certificate installed.
FileMaker Server configures the Linux firewall automatically and opens these ports on the firewall: 80/tcp 443/tcp 2399/tcp 5003/tcp 16000/tcp
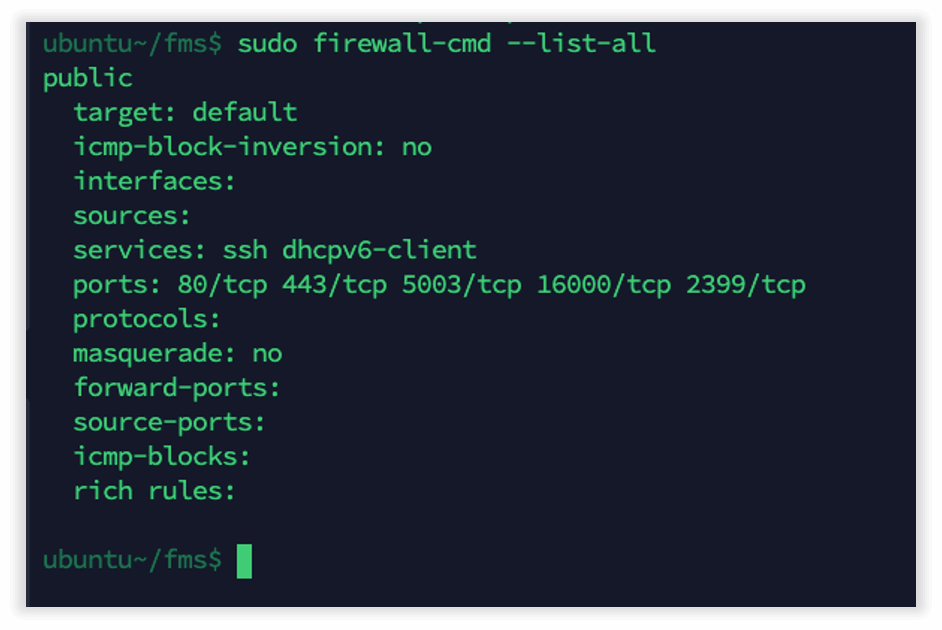
The server we are using for this demo is an AWS EC2 instance, so we are going to use the IP address, but we still have to use https since port 16000 only listens to https requests to complete the full admin console login url:
https://<IP address of your server>:16000/admin-console/signin
This brings us to the expected security warning page:
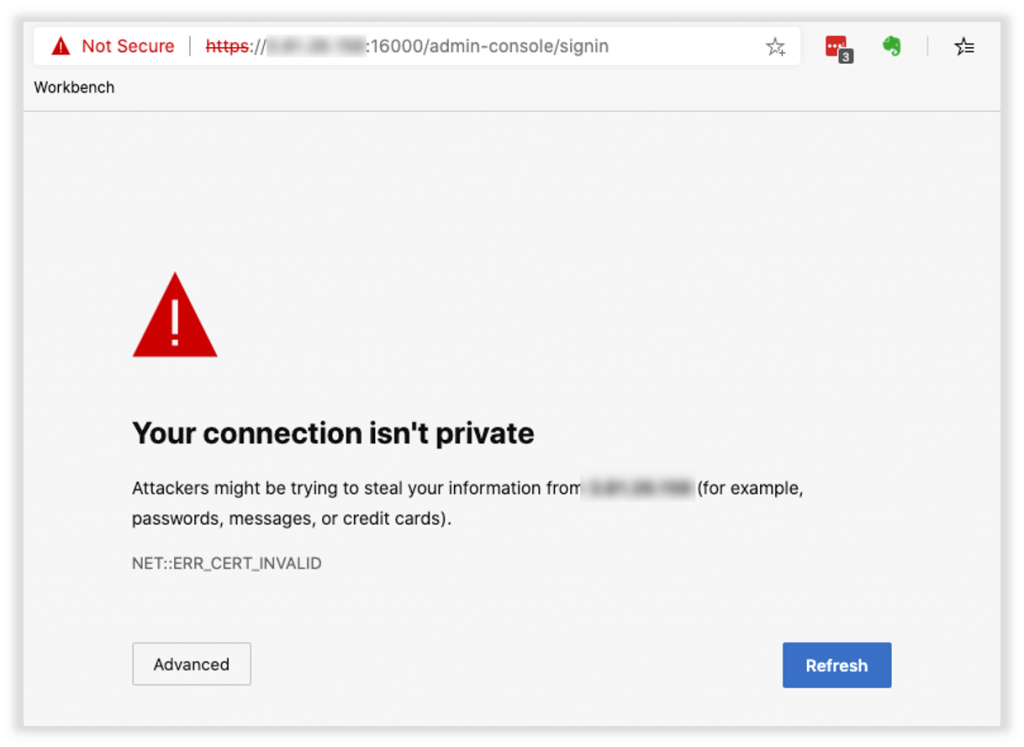
After telling the browser that we are ok with the risks, we can get to the admin console:
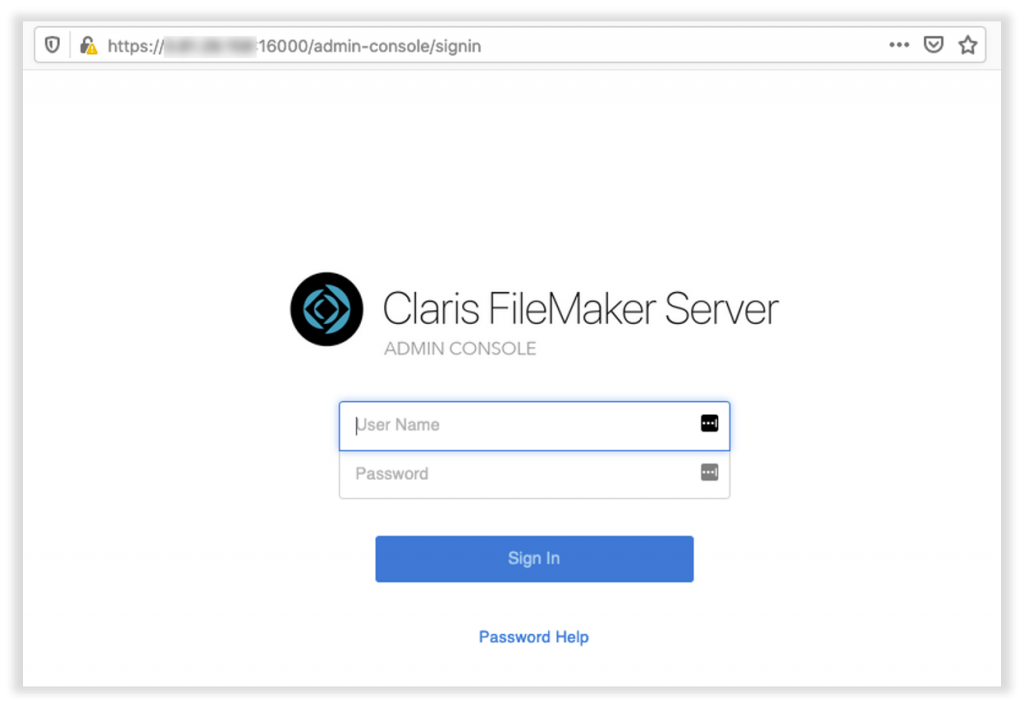
The rest of the process is the same as installing FileMaker Server on Windows or macOS, and it starts by installing a custom SSL certificate. With that certificate in place, you will then reach the admin console on the URL mentioned above but with the full DNS name covered by the SSL certificate.
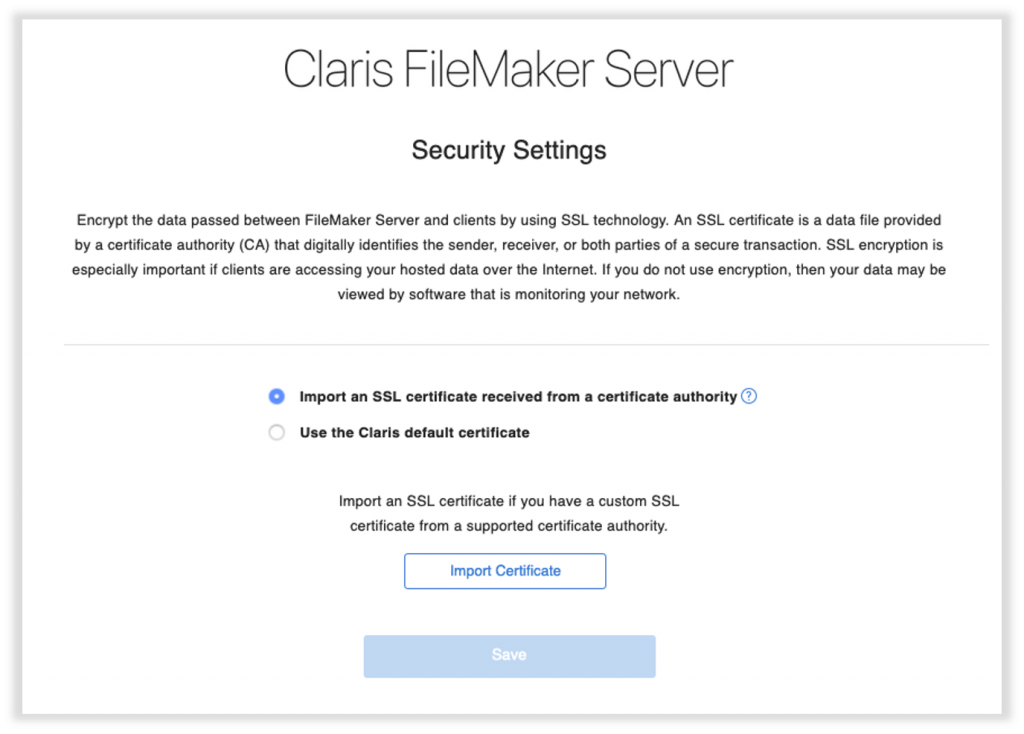
Two configuration changes I make immediately and that I consider to be very important best practices:
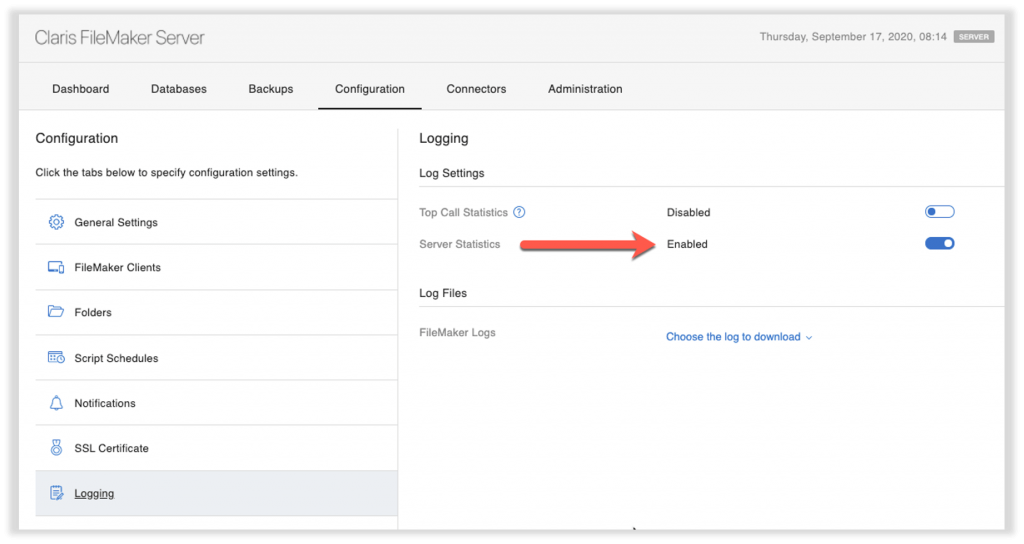
- Turn on the Server Statistics log; it is the #1 source of baseline and troubleshooting information. I typically also enable the Top Call Statistics log – more data is better than less data.
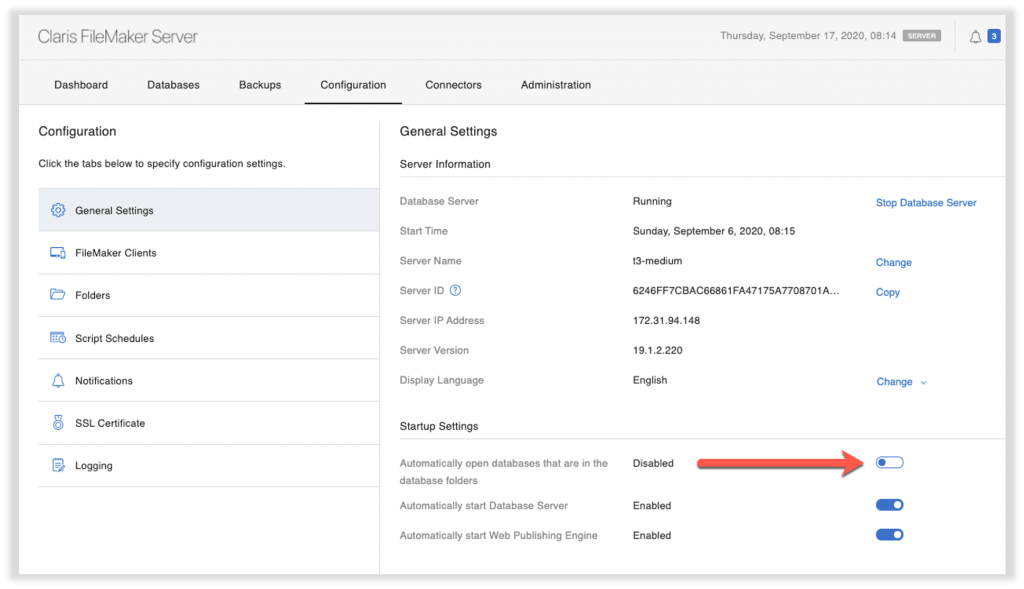
- Turn off the auto-host feature; I do not want FileMaker Server to open files on startup. If the machine goes down, I want to have a chance to inspect the logs and possibly revert to a backup before users start accessing potentially bad files.
One thing that you will note when it comes to enabling the FileMaker Server web publishing engine: FileMaker Server already installed OpenJDK as one of its dependencies. In the install log, you will find something like this:
Get:51 http://us-east-1.ec2.archive.ubuntu.com/ubuntu bionic-updates/main amd64 openjdk-11-jre-headless amd64 11.0.10+9-0ubuntu1~18.04 [37.5 MB]
That means that you don’t need to download it yourself and then upload it to FileMaker Server through the admin console; you can just toggle the web publishing engine switch, and you are all set.
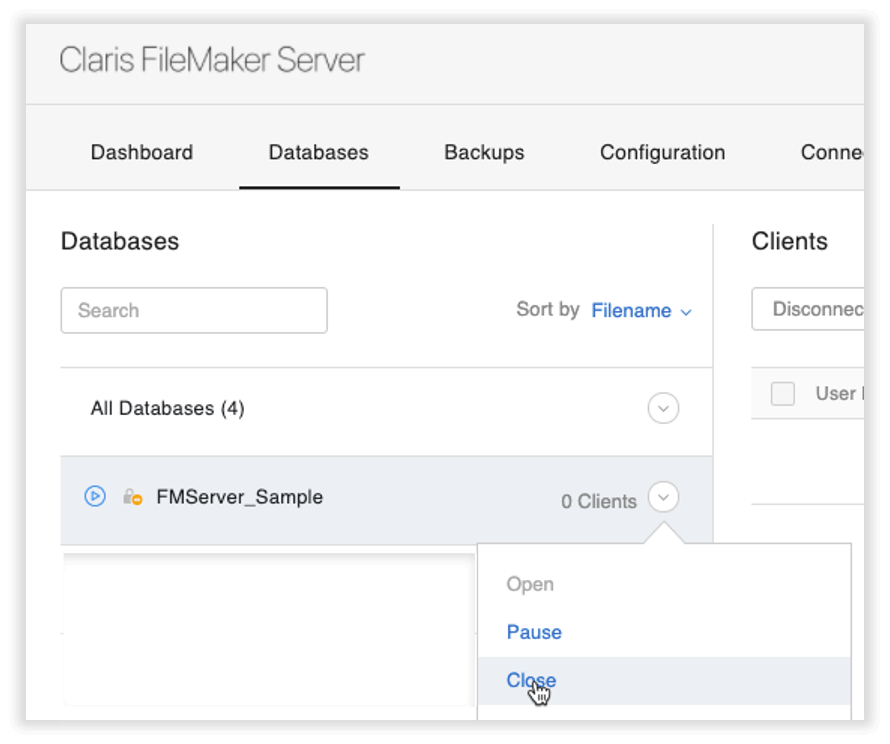
The server needs to be rebooted at this point for the custom SSL certificate to be recognized. Use the admin console to close the Sample file and stop the database server from the General Settings. While there is nothing crucial on that server yet, and both of these actions would normally happen when you reboot the OS anyway; manually closing the files and stopping the database server is:
- A good habit to get into
- An opportunity to verify that everything about FileMaker Server is working normally and it gives you a chance at catching any errors that may come up

After stopping the database server, go back to your server and either start and stop the FileMaker Server service:
sudo service fmshelper stop
sudo service fmshelper start
Or just reboot the server:
sudo reboot now
Moving FileMaker Server Files to Your New Server
By far, the easiest way to get your FileMaker files onto the server is by using the upload feature in FileMaker Pro:
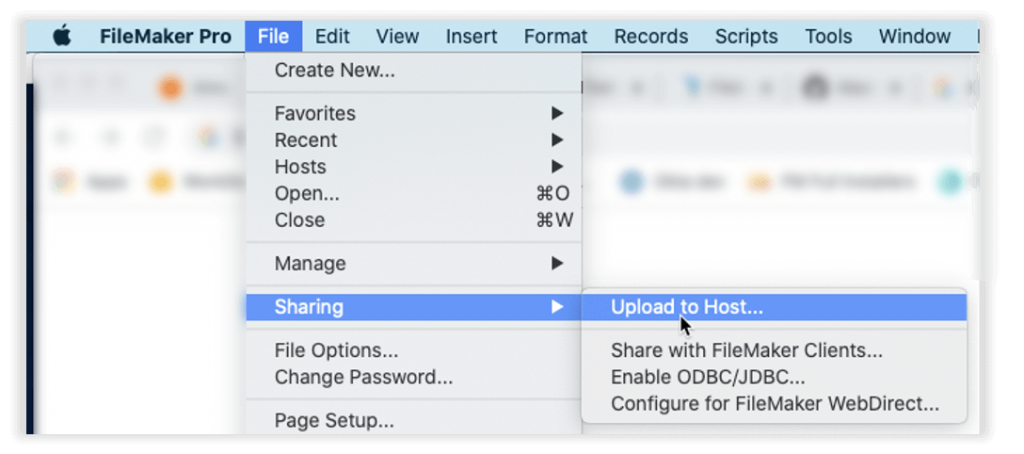
For one thing, this makes sure that the ownership and rights are set correctly at the operating system level so that FileMaker Server can operate on them.
But there certainly are times when it is impractical to use this method. In those situations, you can use the same mechanisms as described above: SCP, SFTP, or AWS S3. But you will then have to move those files to their proper location, and – just as with macOS – you will need to use the chmod and chown command lines to set the owner and rights.
FileMaker Server is installed in this location: /opt/FileMaker/FileMaker Server/
The folder structure there is exactly the same as for the Windows and macOS versions of FileMaker Server.
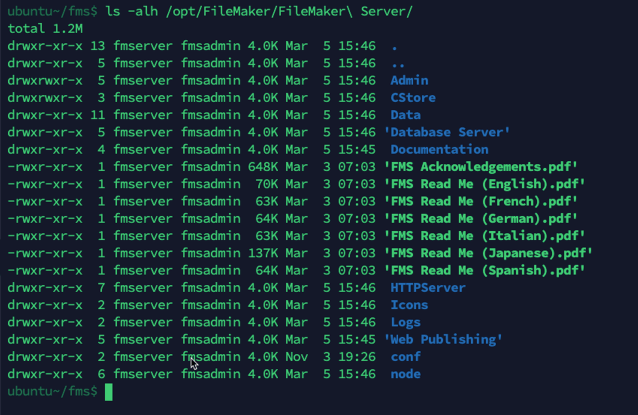
Files that you want to host go in /opt/FileMaker/FileMaker Server/Data/Databases/
You can glean what the proper OS-level rights and ownership needs to be from the screenshot. The commands to set those after you move your files into the proper location are:
sudo chmod 755 -R /opt/FileMaker/FileMaker\ Server/Data/Databases/
sudo chown fmserver:fmsadmin -R /opt/FileMaker/FileMaker\ Server/Data/Databases/
((Remember that you can use the tab key to auto-complete paths as you type.)
Shutting Down and Restarting
The same best practices apply for operating the Linux machinery as with what you would do on Windows or macOS. Before doing anything else, always make sure all your files are closed.
fmsadmin close -y -u <your admin username> -p <your admin password>
If needed, you can also stop the FileMaker Server service itself:
sudo service fmshelper stop
To reboot the machine, you can use:
sudo reboot now
And to completely shut down the machine, use:
sudo shutdown now
Troubleshooting
Log File
The Admin Console in 19.3.1 brings back the ability to review the logs directly in the admin console.
Sometimes it is handier to check the logs directly while you are on the server’s terminal. And there are a few critical places where OS-level logs are kept that are not available through the Admin Console.
FileMaker Server keeps its logs in its usual logs folder, which you will find here:
/opt/FileMaker/FileMaker Server/Logs/

As usual, we highly recommend that you enable the regular Stats.log to have relevant performance data.
You can use nano to open each of these files and look for information about what could be wrong. Since some of these files can be quite big, you can use the tail command to view the last few lines. Tail defaults to the last ten lines, but you can choose how many lines you want to see by specifying the -n parameter. This example will show the last 25 entries from the event log:
tail -n 25 /opt/FileMaker/FileMaker\ Server/Logs/Event.log
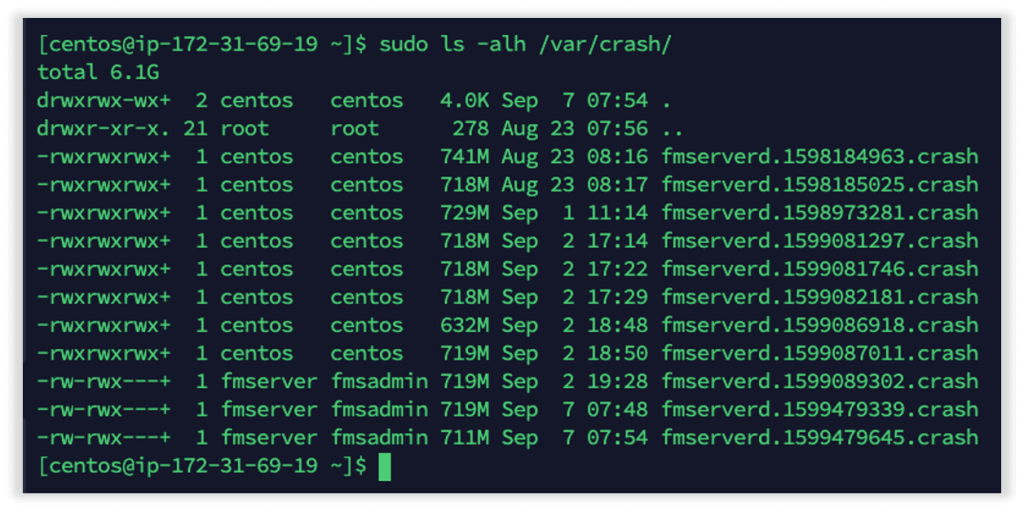
In addition to the FileMaker Server logs folder’s logs, FileMaker Server will also produce crash logs in the /var/crash/ folder if one of its processes crashes.
To list the crash logs, do:
sudo ls -alh /var/crash/
When you see files listed there with a FileMaker Server process name as part of their file name, open a support ticket with Claris.
Resource Consumption
A very useful command to see which processes are consuming the most resources is top. As with all command-line tools, you can read up on how to use this command right from the machine itself by asking for the manual:
man top
(Press q to quit the manual.)
A command we have used before can come in handy here: the list of FileMaker Server processes, which will give us the process IDs to give to top to show us just what those processes are doing. For example, if we want to see just how the database server process (fmserverd) and the script engine process (fmsased) are doing, we give top just those two process ids like this:
top -p1499 -p1557

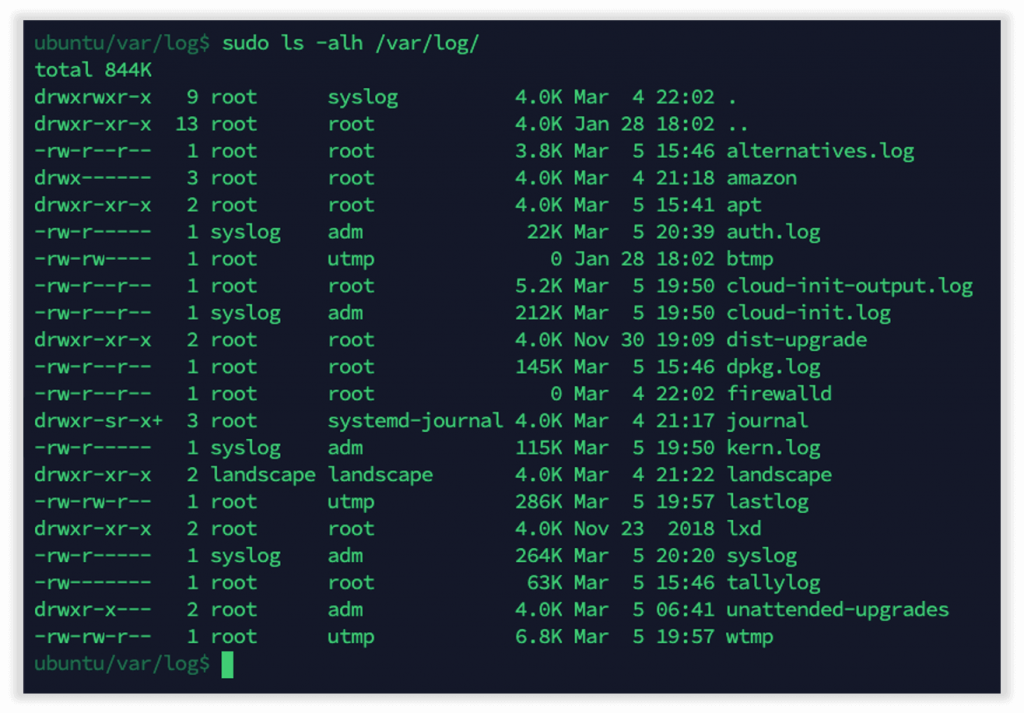
Ubuntu and its various services keep their own logs which you will typically find in /var/log/. These are also tremendously useful in troubleshooting your server.
Other Useful Linux Commands
Another way to check the version of Ubuntu you are dealing with, use:
sudo cat /etc/*-release
If you are uncertain what hardware the server is running under, you can use:
sudo lshw -short
and to quickly get a count of the number of processors, there are:
nproc
To see how much free disk space there is, in a readable format:
df -h
Checking FileMaker Version, Build, License Key, and Hostname
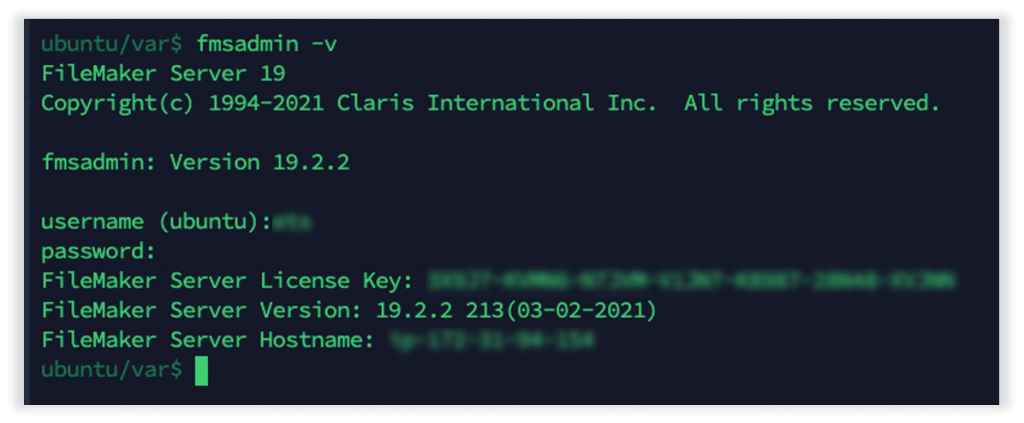
While you are on the server, you may want to check what version of FileMaker Server is installed. The obvious command is:
fmsadmin -v
Unfortunately, that will only tell you the major and minor versions but not the build number unless you also know the admin console username and password.

If you do know those credentials, you can enter them (or provide them with the -u and -p command-line options). This will show you the full version, including the build number as well as the license key and hostname:
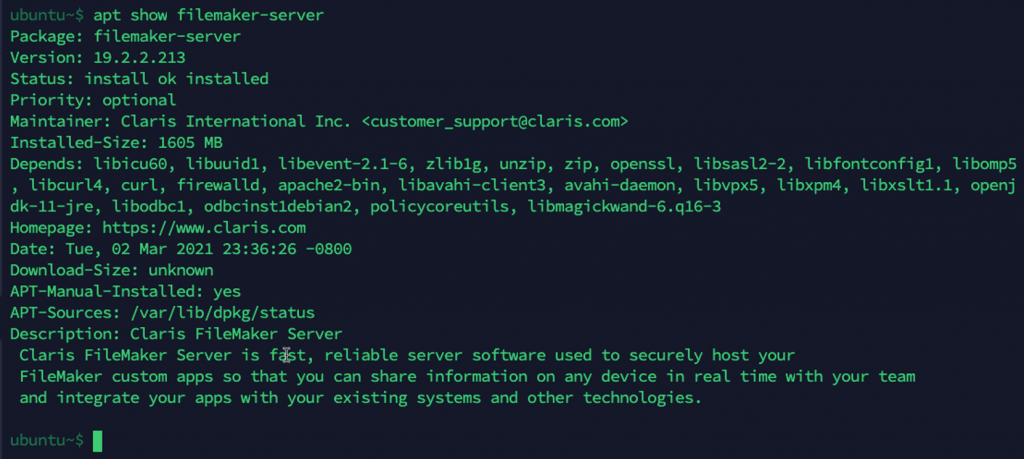
If you do not know the admin console credentials, then you can still get the version and build info from the yum package manager:
apt list --installed | grep filemaker

Or
sudo dpkg -l | grep -i filemaker

And to get even more info about the FileMaker Server package that has been installed:
apt show filemaker-server
Next Steps
We hope to have given you a good head-start on setting up your first Linux FileMaker Server. Look for our other write-ups on https://www.soliantconsulting.com/blog/ that deal specifically with upgrading FileMaker Server. As always, feel free to leave comments and questions and find us on community.claris.com for follow-ups.
Hey Wim, Excellent write up! I’m personally very jazzed about being able to leave the Windows world behind. Linux is where it’s at! You should check out using htop (over basic top) and pstree. Both of which were not installed by default on cent but are on ubuntu. htop will give you a much prettier view and ‘pstree -p | grep fms’ will give you great output for pids.
Although htop has great filtering with F4 and can output in tree mode with F5. So passing pids to htop isn’t really necessary to just see what you want.
Thanks for all that great information! It helped me a lot to setup FMS 19 on a Ubuntu test server. The only thing that didn’t work for me was the install command. I had to add “./” before the name of file ( sudo apt -y install ./filemaker-server_19.3.1.47_amd64.deb )
Hi Wim, Have you ever played with the FMDataMigration Tool? We can get it to work on Windows but not on Ubuntu?
Hi Rich,
Yes we have; we have it working correctly on Ubuntu. It does take some special setup over and beyond what the documentation says in either scenario (when running on a Ubuntu machine that has no FileMaker Server installed or on a machine that does). There are some community posts of mine that describe the required setup. If you are on the ETS list you may find the setup there too.
Best regards,
Wim
See my instructions on this post: https://community.claris.com/en/s/question/0D73w000006VK8A/detail?s1oid=00Di0000000eyqY&s1nid=0DB0H000000fxYs&emkind=chatterUpvoteNotification&s1uid=0050H00000Bq6qO&emtm=1628336398604&fromEmail=1&s1ext=0
Thanks Wim. I got it working in standalone but still not managed to get it working on the FMS itself. Its not to bigger deal as we have it all on digital ocean and have shared a volume between the servers but its not ideal obviously.
Thanks
Rich
Many are probably aware, but just to say it: SSH has native space in Windows Server 2019 and Windows 10 (Current versions) and later (as best as I can tell). It may require a small amount of setup, but is not hard. Windows Server 2019 will allow both an SSH client and server. Windows 10, I have only seen native support for an SSH client.
See link for Windows Offical installation instructions:
https://docs.microsoft.com/en-us/windows-server/administration/openssh/openssh_install_firstuse
Instructions on setting up the PEM file for SSH use in windows:
https://www.techgalery.com/2020/09/how-to-connect-ssh-using-pem.html
I could not find anything that looked “official”. My differing method is, on disabling inheritance, to remove everything but your user then apply the changes. I am on as an administrator for my computer so that may only work for cases like mine.
I am unaware of any limitations on the functionality/ concerns related to its use. But I have been able to use SSH from Windows Powershell (and CMD for those that use it) and do not miss having to use Putty and the PPK files that are associated with that software.
Thanks Wim, a useful article as always.
A couple of gotchya’s I encountered when setting this up with current (as I write) version of FMS 19.4.2 – for those reading this in 2022 these are:
1. AWS AMI instance for Ubuntu 18.04 now issues .cer private keys, not .pem. When attempting to use this I got an error “..is required that your private key files are NOT accessible by others.” – to fix this in zsh use “chmod 600 yourFilename.cer” (this revokes all file access except your own).
2. After FMS install I couldn’t access admin console on port 16000 (my fault for not reading release notes) admin-consle now uses port 443 for external access, which implies that you must setup your SSL on the server before external admin access is possible.